
Bring your SuperAgent to Shopify
As part of your Captivation onboarding, you will have already selected your SuperAgent and voice.
This instruction set takes you through how to bring your SuperAgent experience into your Shopify site, customise how it appears, test it safely and publish when ready.
Captivation works alongside your existing Shopify store. Shopify continues to manage your products, variants, cart and checkout, while Captivation adds the conversational shopping experience.
Your SuperAgent
Your selected SuperAgent and voice are managed by Captivation and connected automatically through a unique Captivation ID that is generated for you.



Overview of the installation process
Getting your SuperAgent live on Shopify is easy!
You will:
Duplicate your current Shopify theme so you can install and test privately.
Open theme.liquid within the duplicated theme.
Copy and paste the Captivation code block immediately before the closing </body> tag.
Add your unique Captivation ID and adjust any storefront appearance settings you would like to customise.
Save and preview the duplicated theme.
Test the experience across desktop and mobile, including products, variants and cart.
Publish the tested theme when everything is ready.
No Shopify rebuild is required. Captivation sits alongside your existing storefront. Shopify continues to manage your catalogue, products, variants, cart and checkout.
Overview of what you can customise
The code added to your Shopify site controls how the SuperAgent launcher and surrounding experience appear on your storefront.
Widget / Launcher
This is the small Captivation element that sits in the corner of your Shopify site.
You can customise:
Position: bottom left or bottom right
SuperAgent image: show or hide
Image size: large or small
Image shape: circle, rounded or square
Image placement: left, right or above the message bar
Message bar: show or hide
Message bar shape: pill, rounded or square
Launcher messages: up to five
Message timing
Message bar colour
Message text colour
SuperAgent border colour
SuperAgent background colour
Optional background image behind the SuperAgent
Separate desktop and mobile styling
Expanded Portrait
This is the standard experience that opens when a shopper selects the Widget / Launcher.
You can customise:
Header background colour
Header text and icon colour
Header wording
The SuperAgent experience, voice, personality, knowledge and commerce behaviour are managed through Captivation.
Expanded Landscape
On desktop, shoppers can expand the Portrait experience into a wider Landscape view.
This uses the same Captivation experience and header styling, with more horizontal space for the conversation, products and media.
On mobile, the experience opens full screen rather than using a separate Landscape view.
Install your Captivation AI SuperAgent
The code added to your Shopify site controls how the SuperAgent launcher and surrounding experience appear on your storefront.
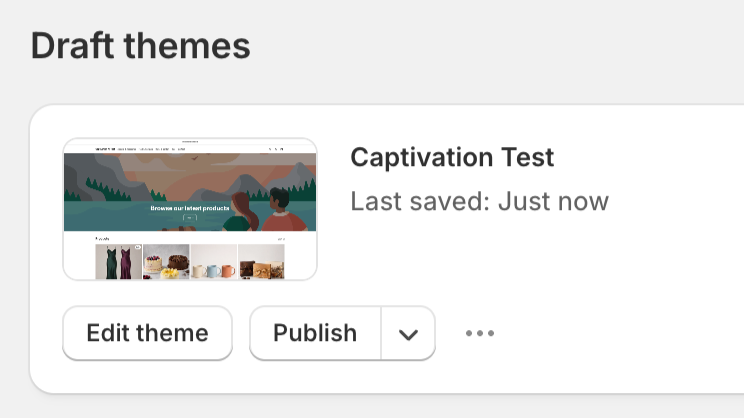
1. Duplicate your current theme
In Shopify Admin, go to:
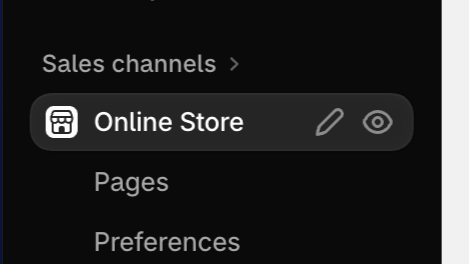
Shopify Admin → Online Store → Themes
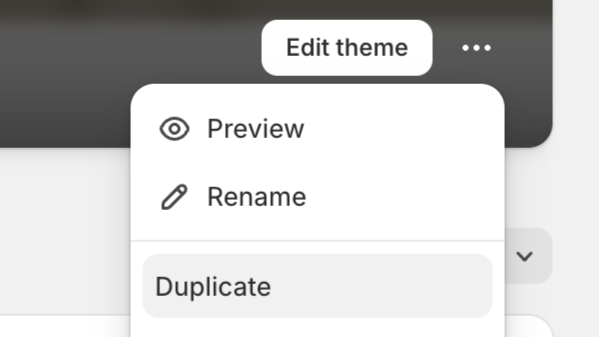
Find your current live theme/site, select the ••• menu, then choose:
Duplicate
Rename the duplicate something clear, for example:
Captivation Test
Keep this version unpublished while you complete the setup.
2. Open the theme code
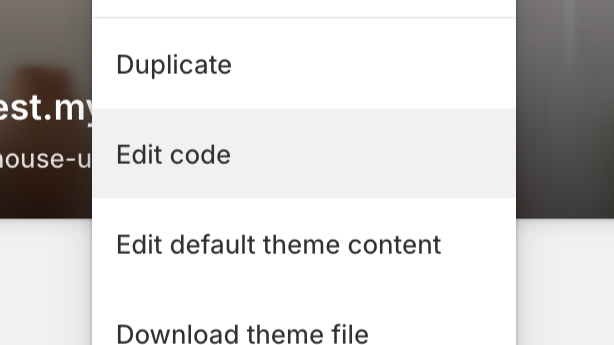
On the duplicated theme, select:
••• → Edit code
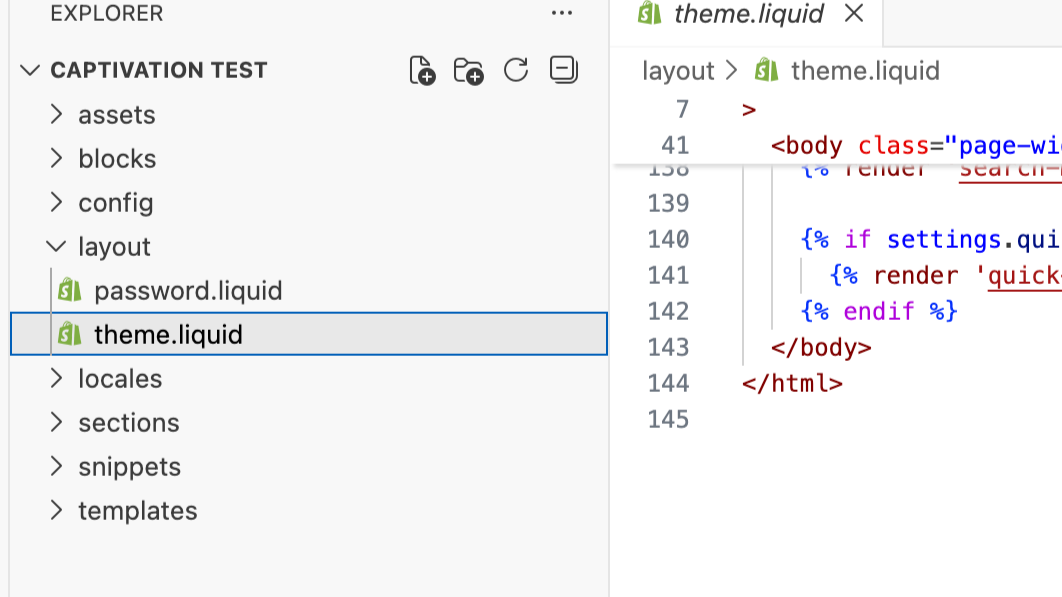
Under Layout, open:
theme.liquid
Scroll DOWN towards the bottom of the code and find:
</body>
3. Add the Captivation code
Copy the complete code below and paste it immediately above the closing </body> tag in theme.liquid.
You can customise the settings in the next section before saving your theme.
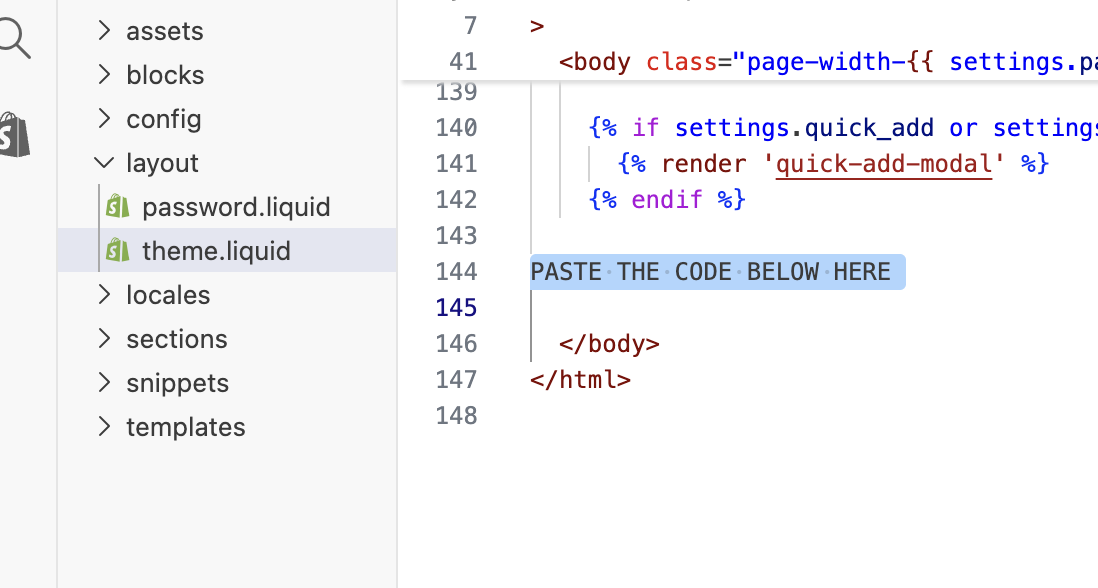
Important: Only add one Captivation code block to your theme. If Captivation is already installed, replace the existing block rather than adding another copy.
4. Add your Captivation ID
Your unique Captivation ID connects the Shopify widget to your SuperAgent experience.
In the code you just added, find:
<script>
window.CaptivationSettings = {
captivationId: "YOUR_CAPTIVATION_ID",
It sits right at the start of the code block
Replace YOUR_CAPTIVATION_ID with the ID supplied by Captivation.
For example:
captivationId: "your-store-id"
Keep the quotation marks in place.
Your Captivation ID must match exactly. Do not change it unless instructed by the Captivation team.
The code supplied includes default settings, so you can save and preview it immediately!
Below you can see how to customise it to match the look and feel of your brand and website
Customise your Widget / Launcher
Your Captivation code includes default styling, but you can adjust the Widget / Launcher to suit your storefront.
Only change the settings inside the CaptivationSettings section of the code.
1. Widget Position
Choose which corner of your site the Widget / Launcher appears in.
position: "bottom-right"
Options:
"bottom-right"
"bottom-left"
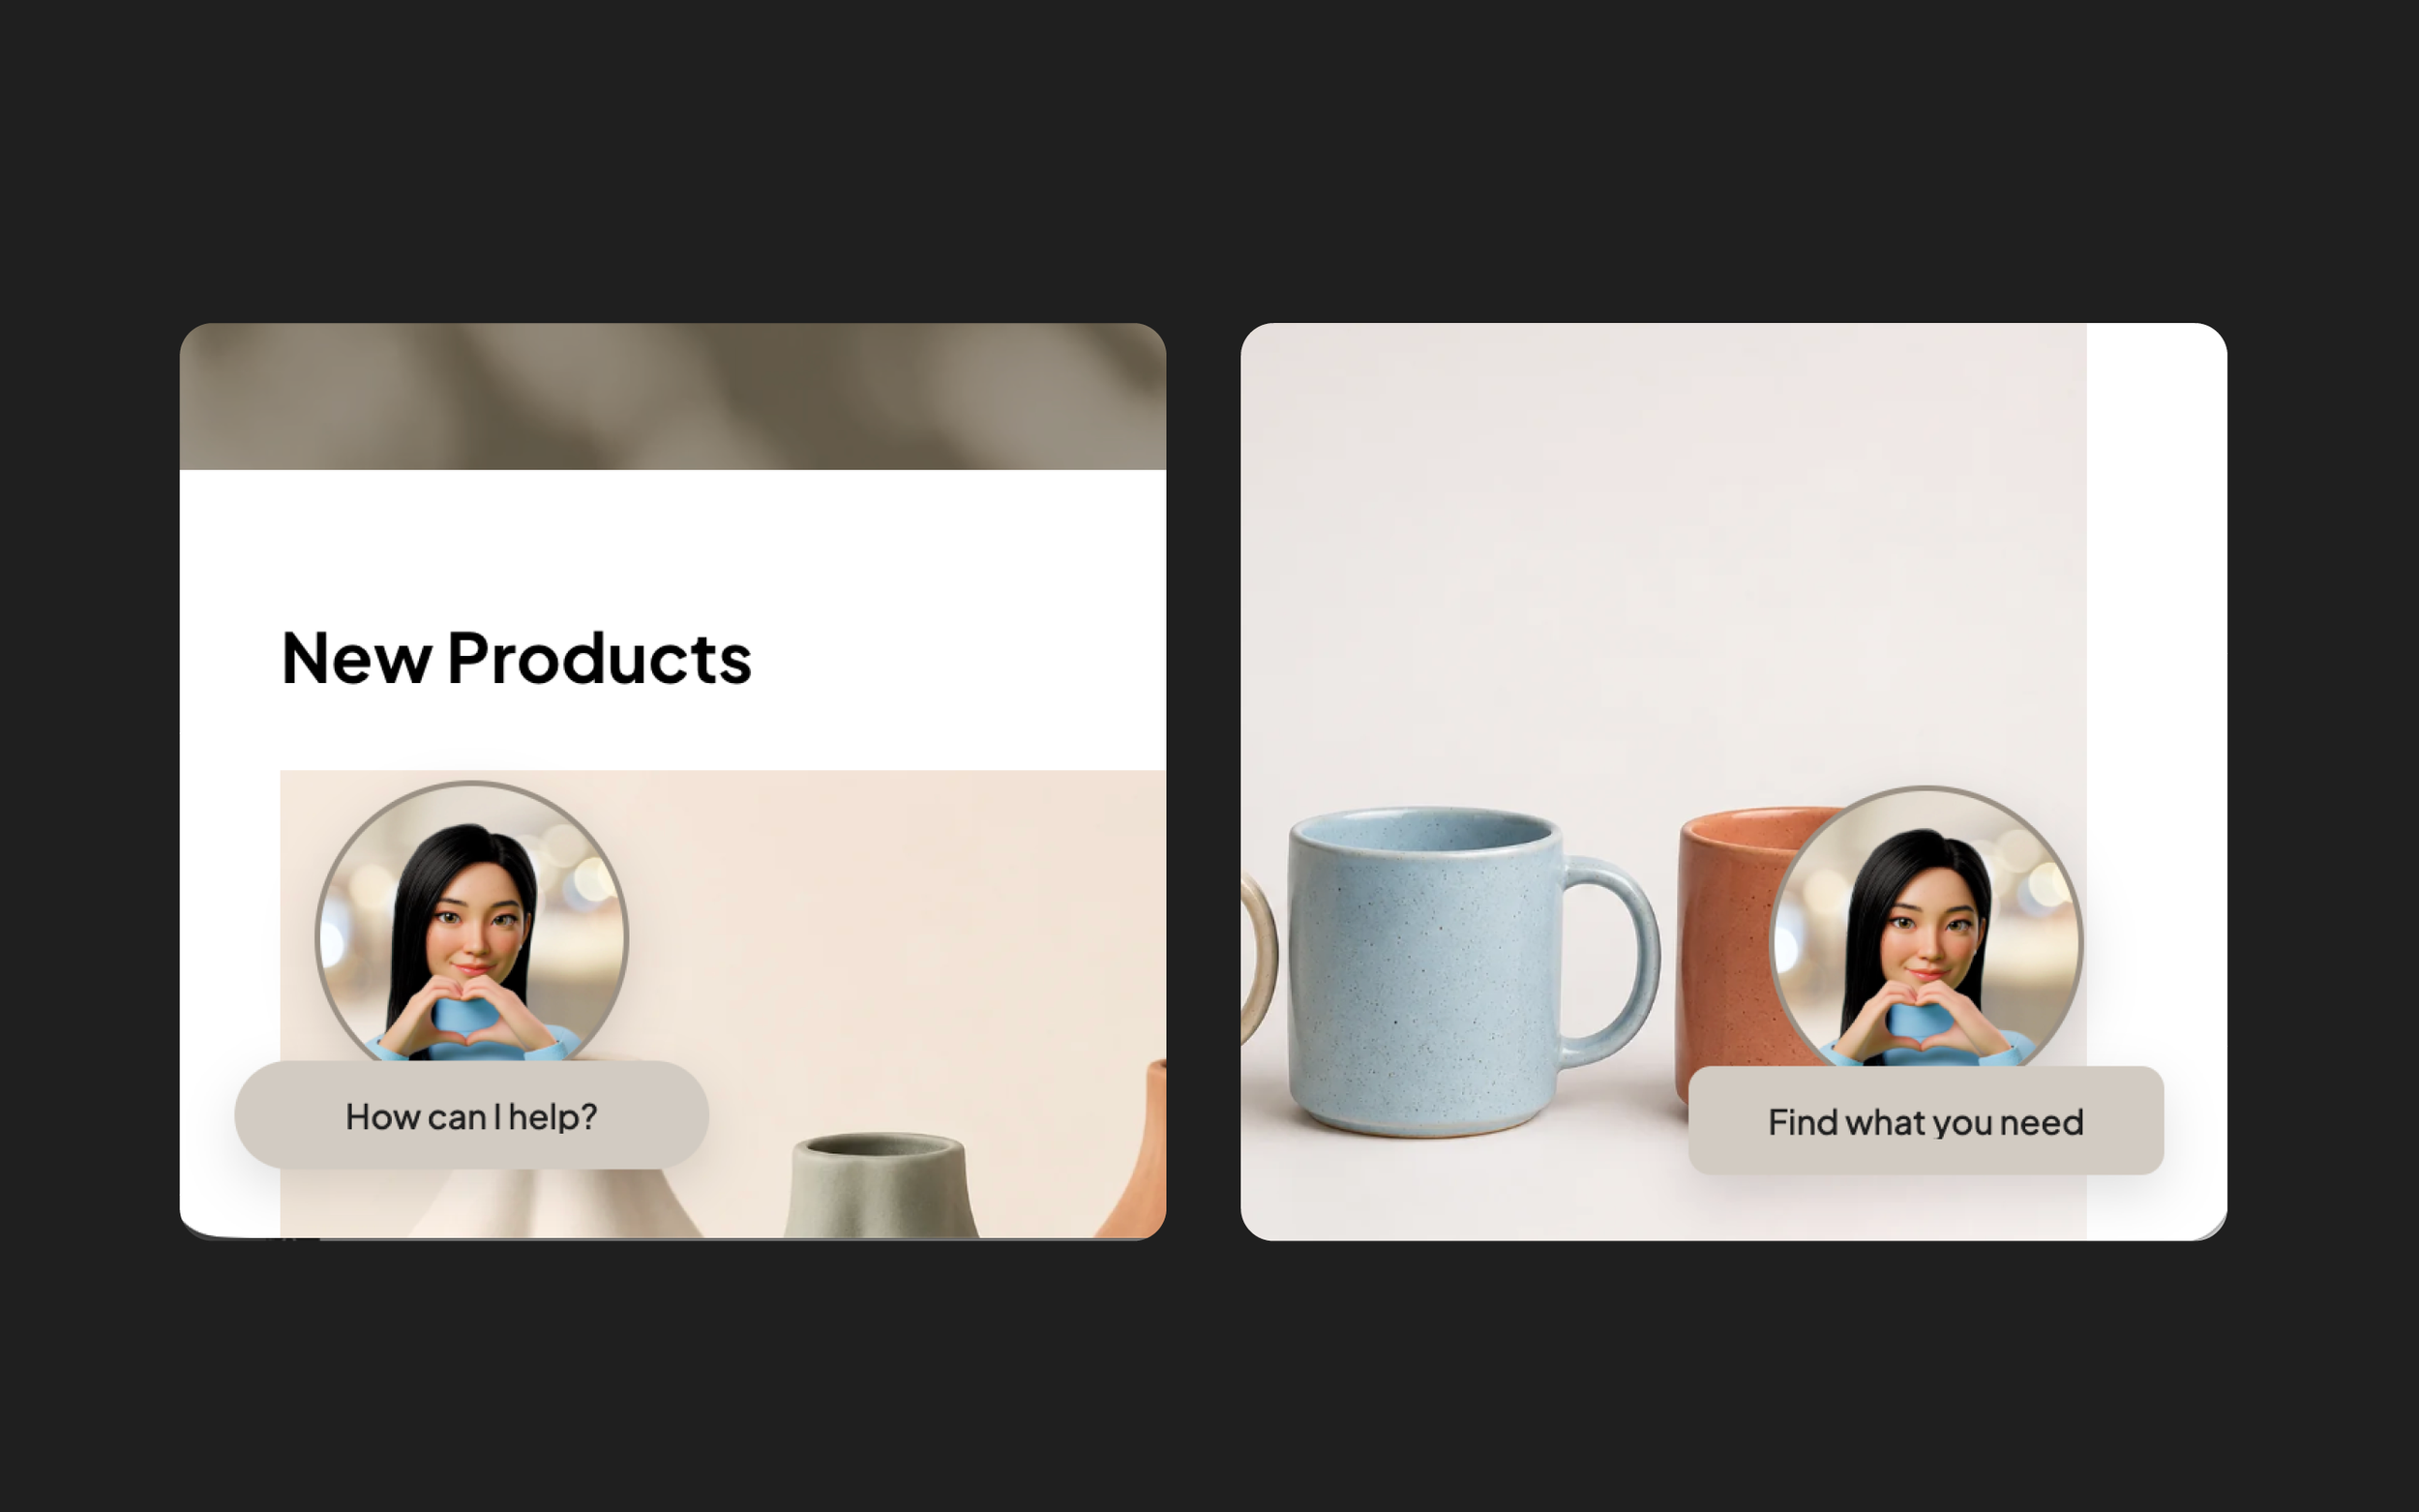
2. Show or hide the SuperAgent image
imageEnabled: true
imageEnabled: false
true = show the SuperAgent image
false = hide the SuperAgent image
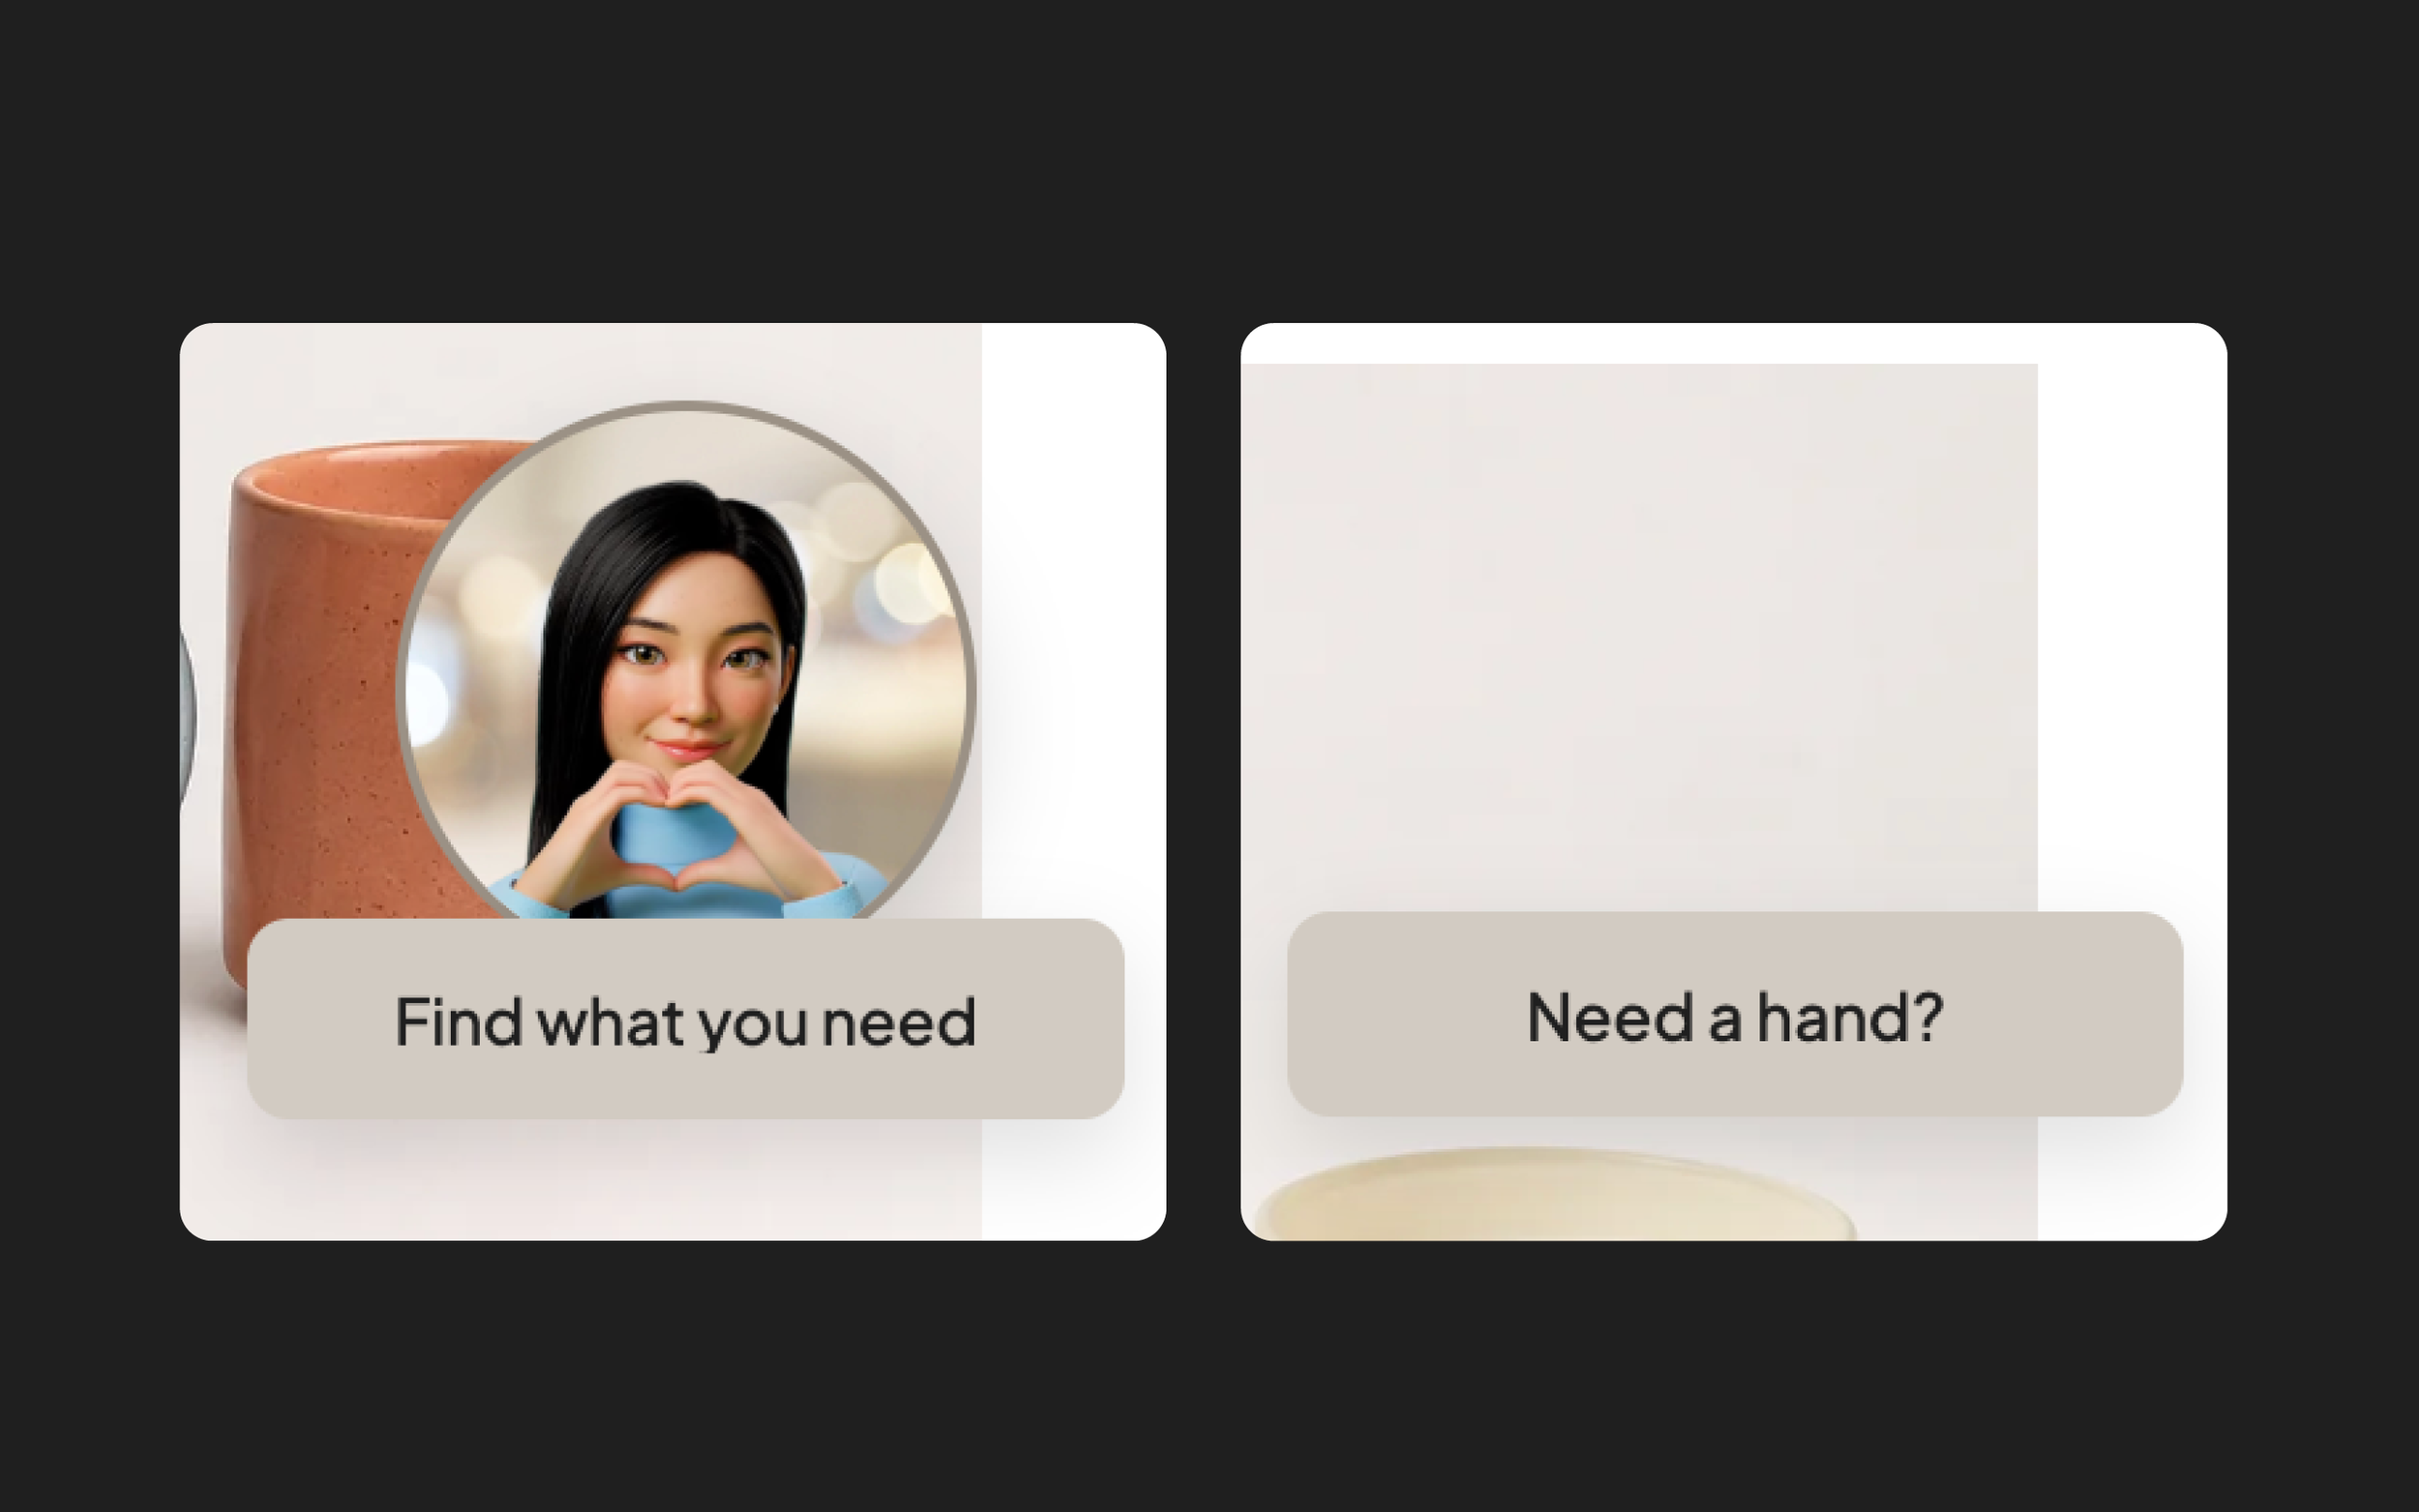
3. Show or hide the message bar
textBarEnabled: true
textBarEnabled: false
true = show the message bar
false = hide the message bar
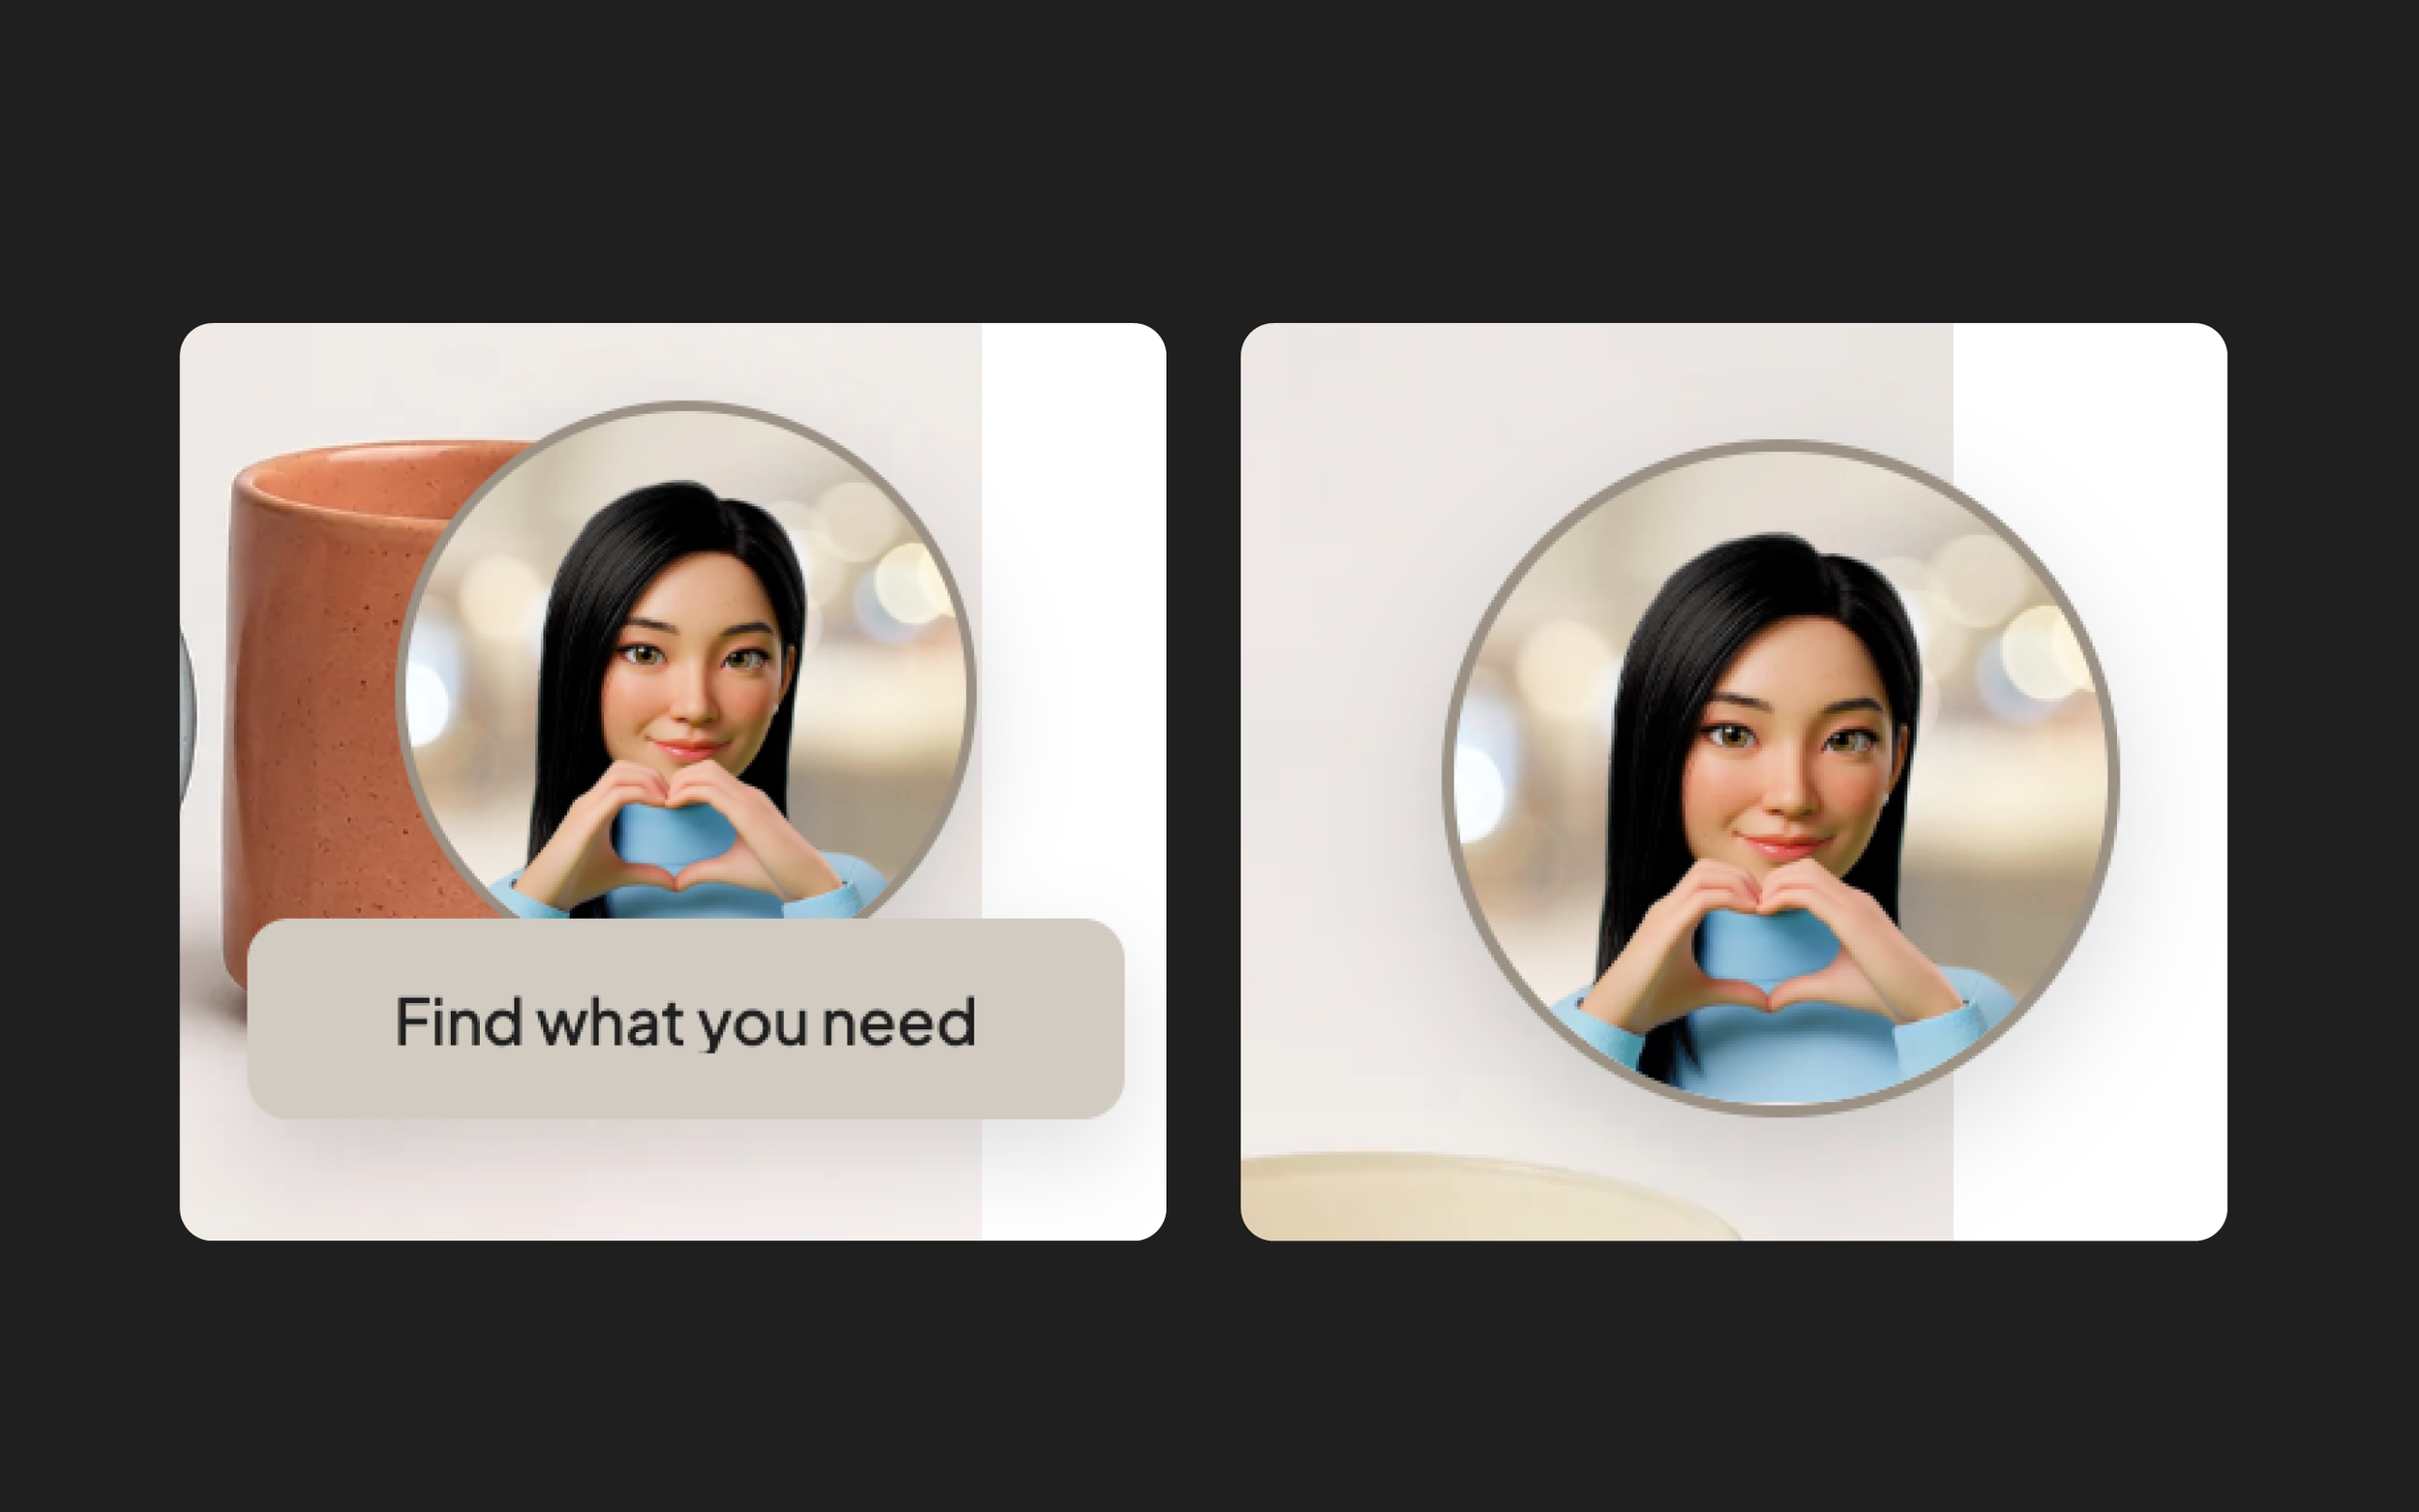
4. SuperAgent Shape
imageShape: "circle"
imageShape: "rounded"
imageShape: "square"
circle = fully circular
rounded = soft rounded-square corners
square = straight edges with square corners
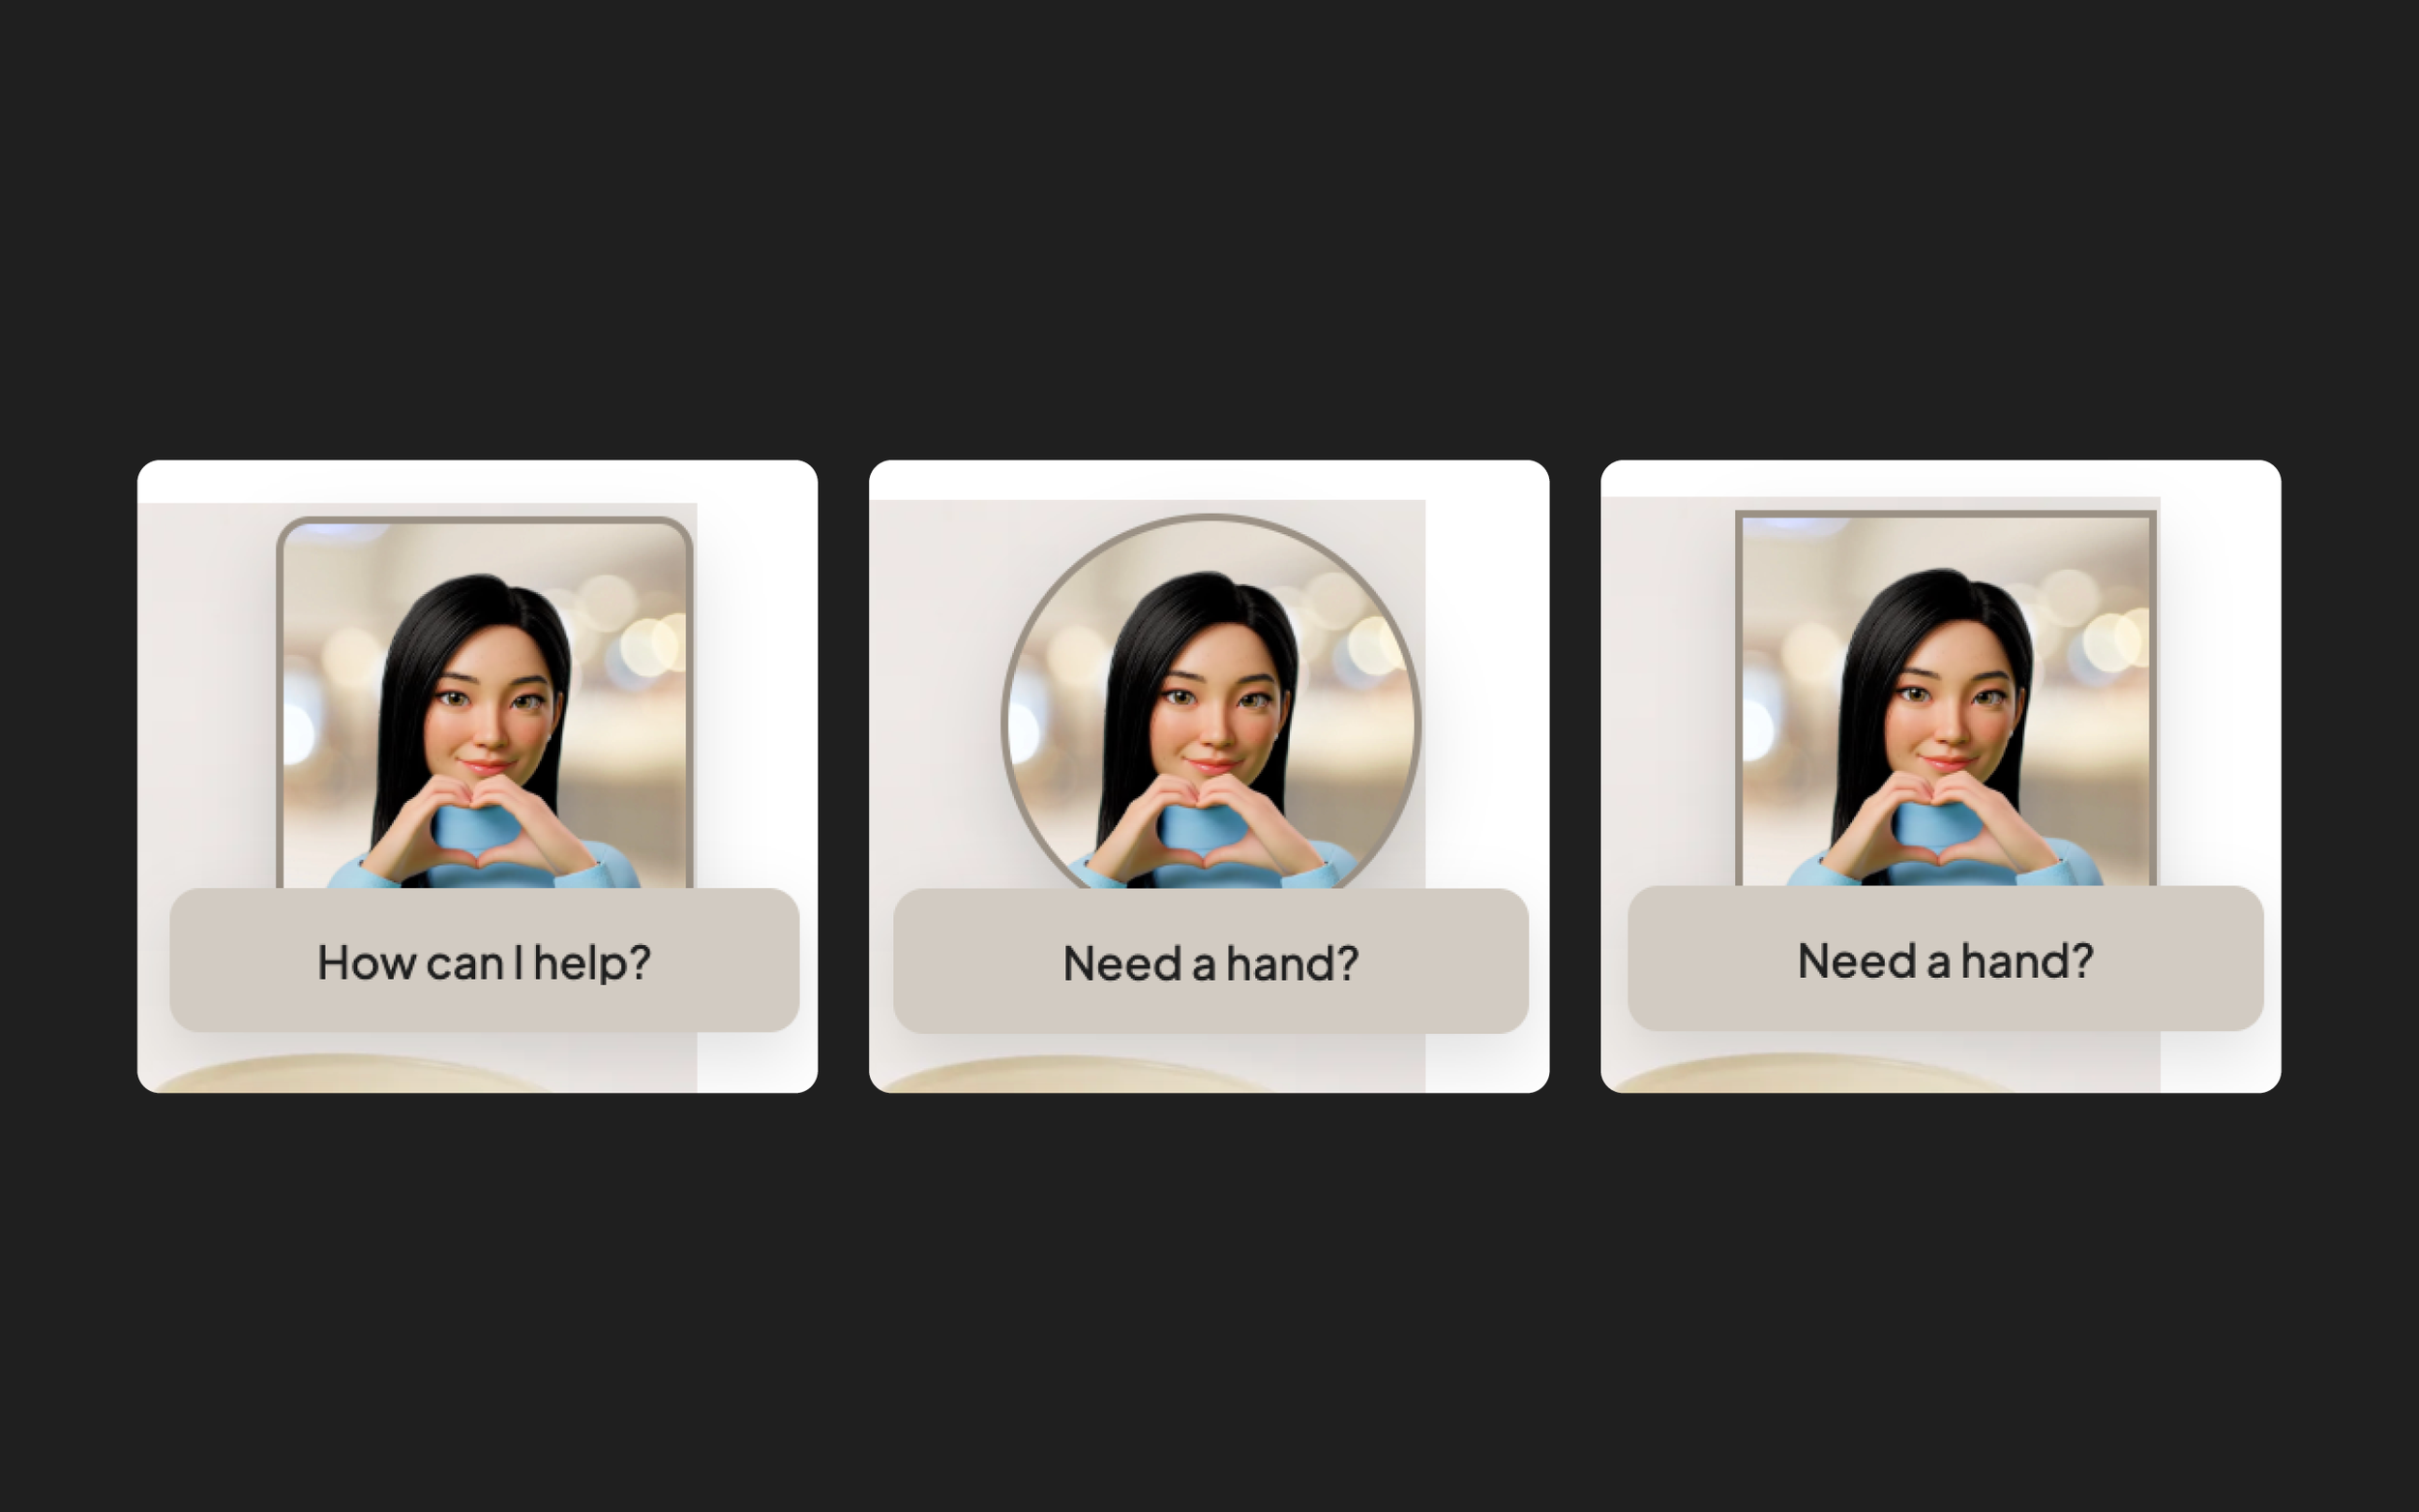
5. SuperAgent Image Size
imageSize: "large"
imageSize: "small"
large = auto-set preferred size
small = auto-set smaller size
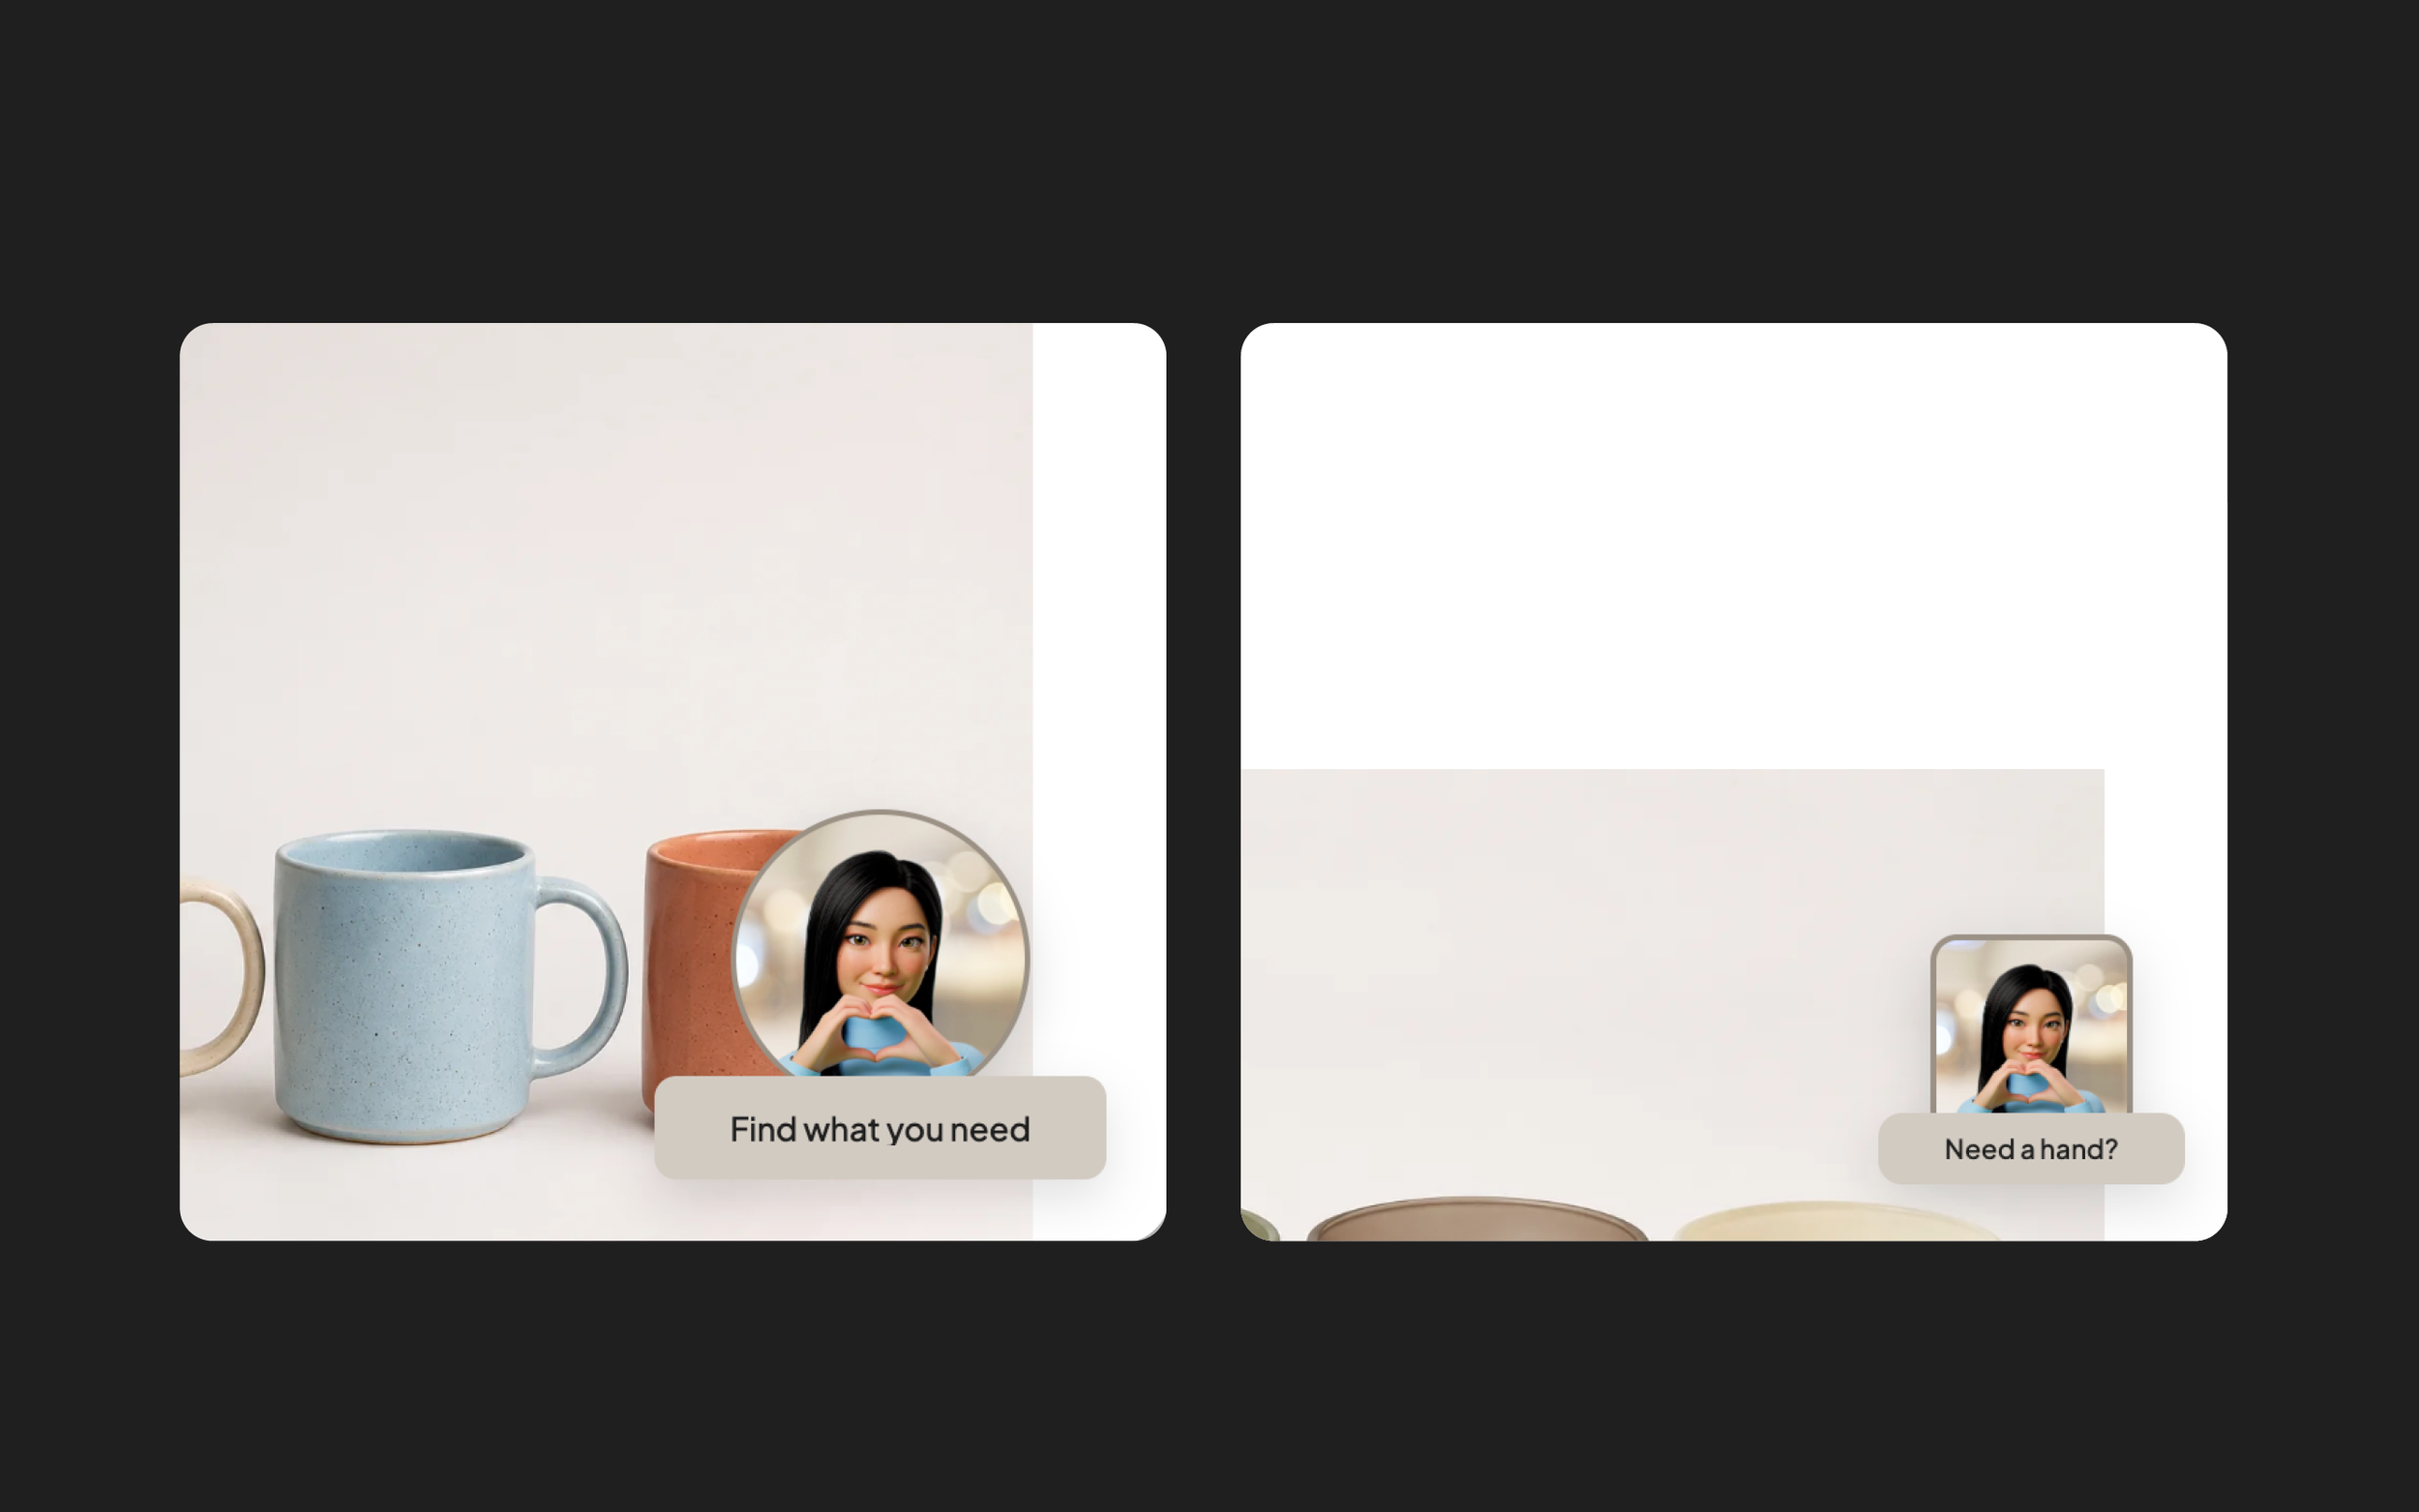
6. Message Bar Shape
barShape:"rounded"
barShape:"pill"
barShape:"square"
rounded = a rectangular bar with soft rounded corners
pill = a fully rounded bar with curved ends
square = a rectangular bar with straight edges and square corners
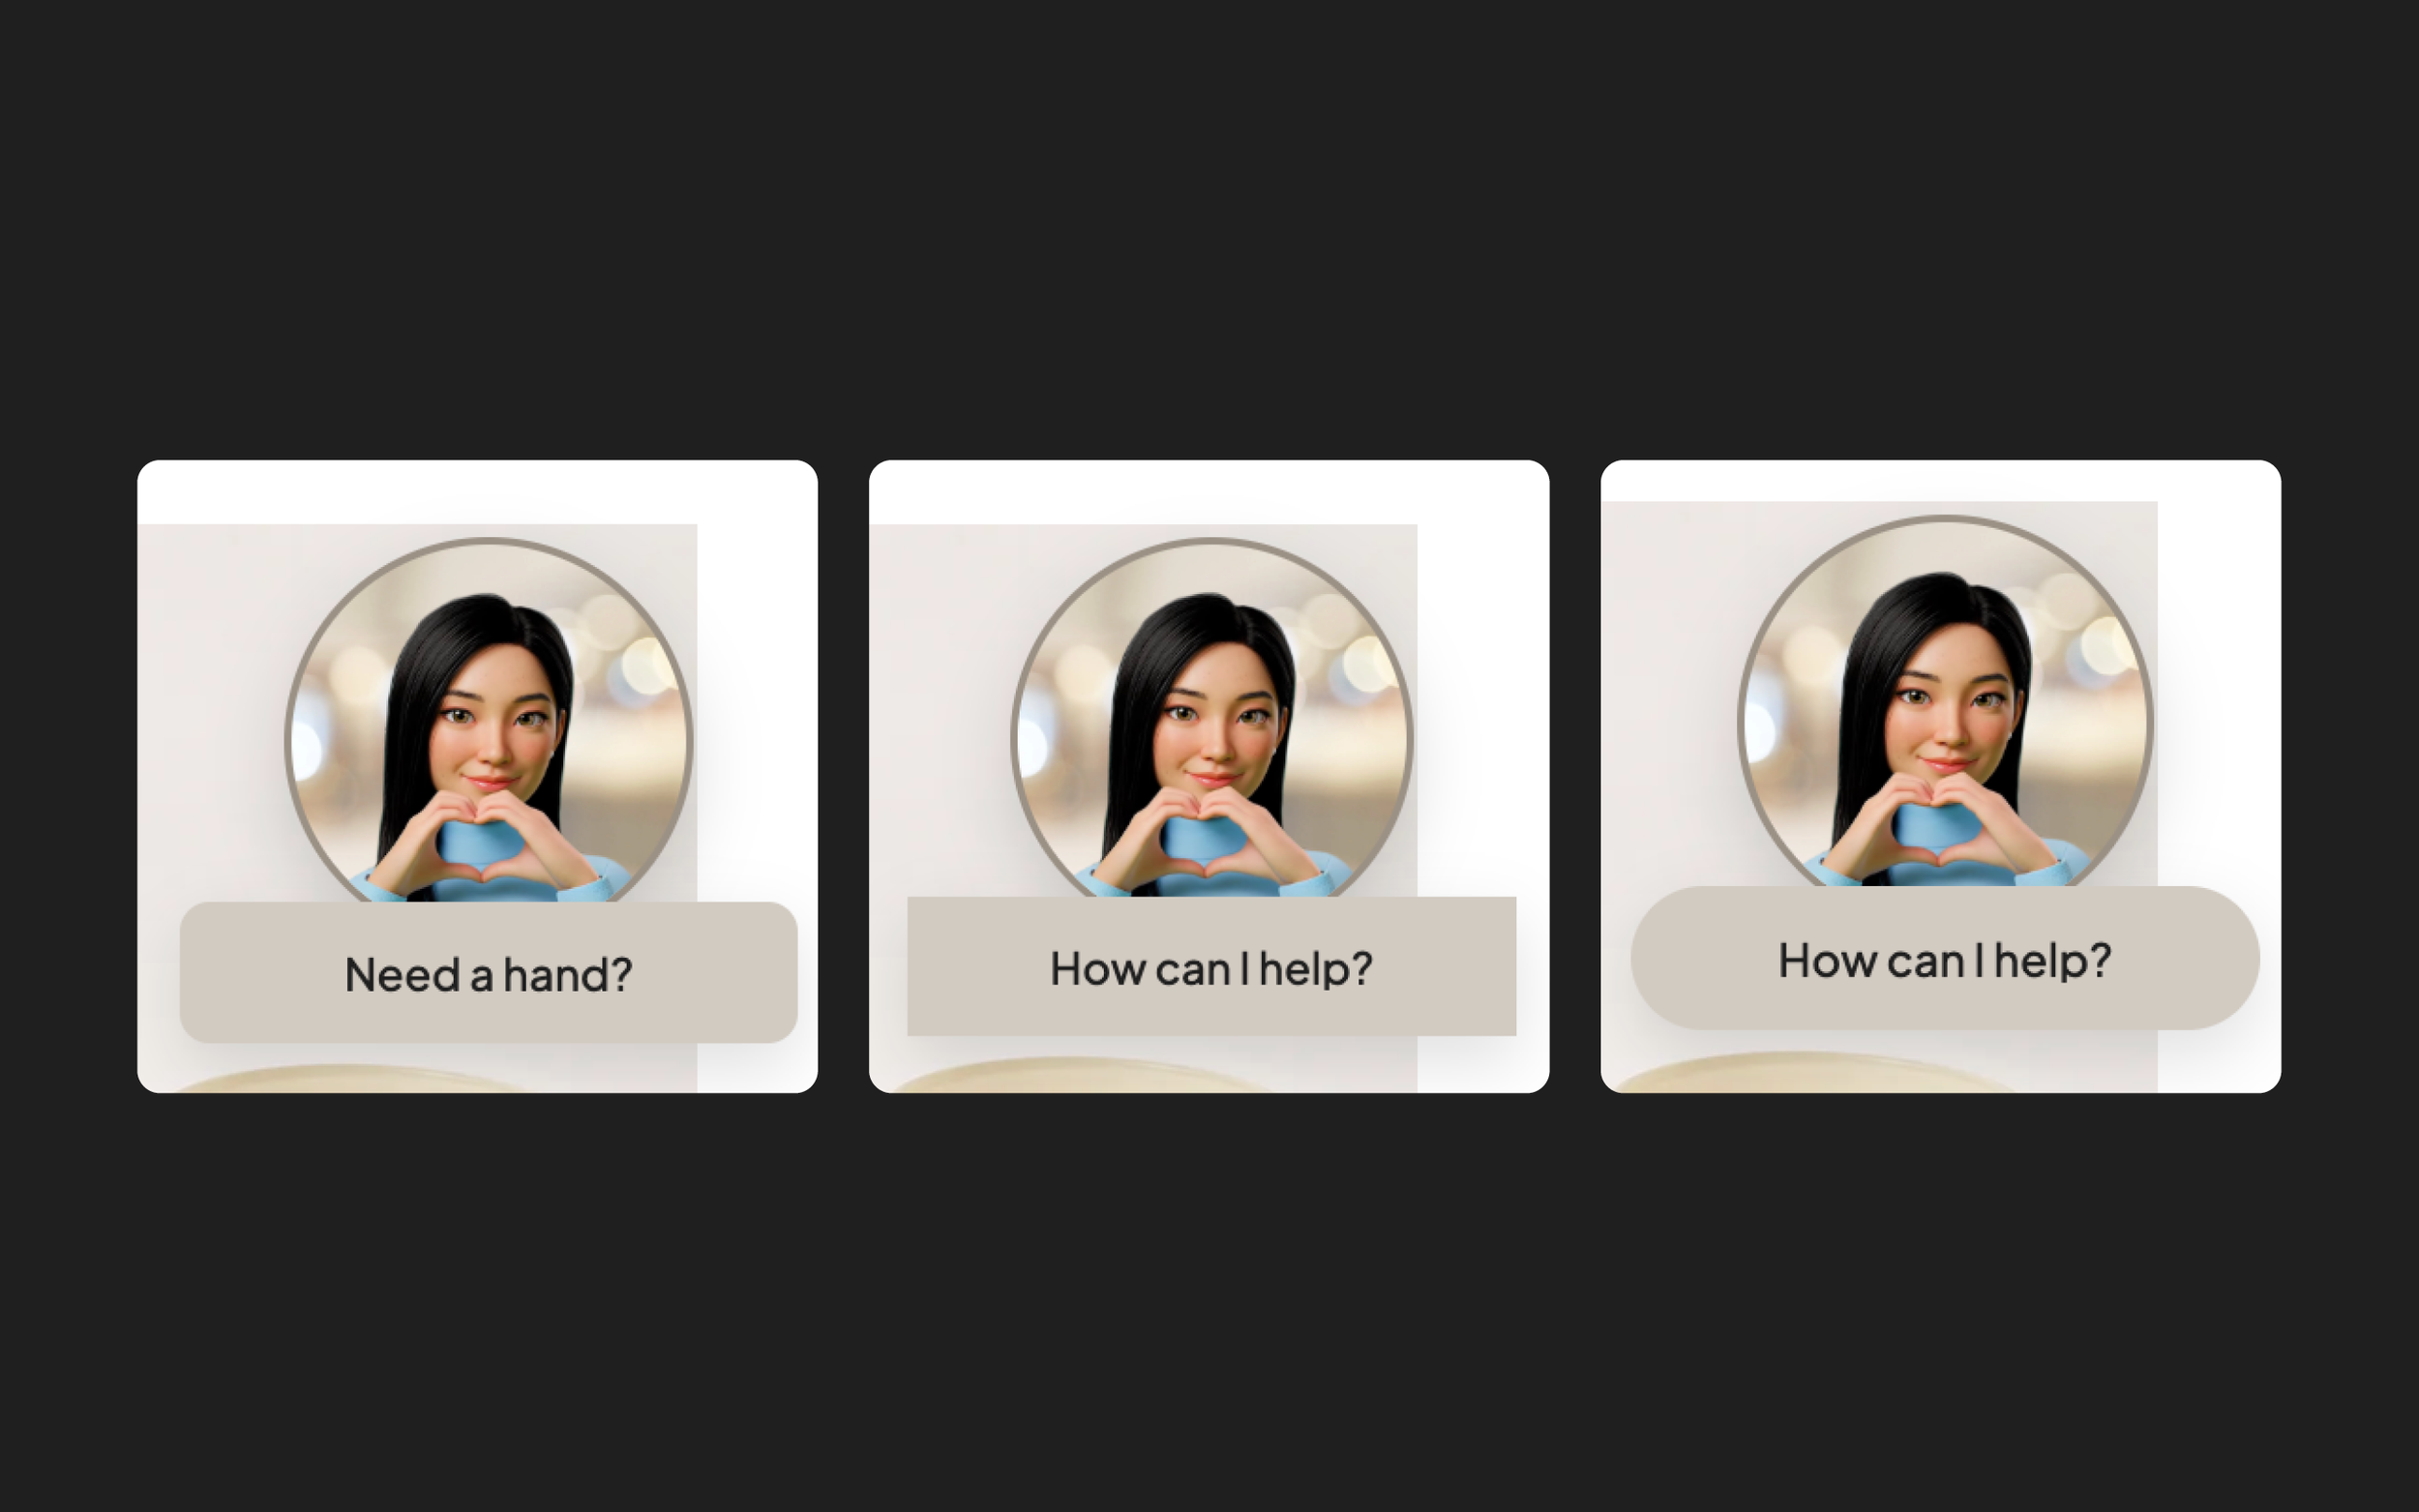
7. SuperAgent Image Placement
imagePlacement: "top"
imagePlacement: "left"
imagePlacement: "right"
top = above the bar
left = to the left of the bar
right = to the right of the bar
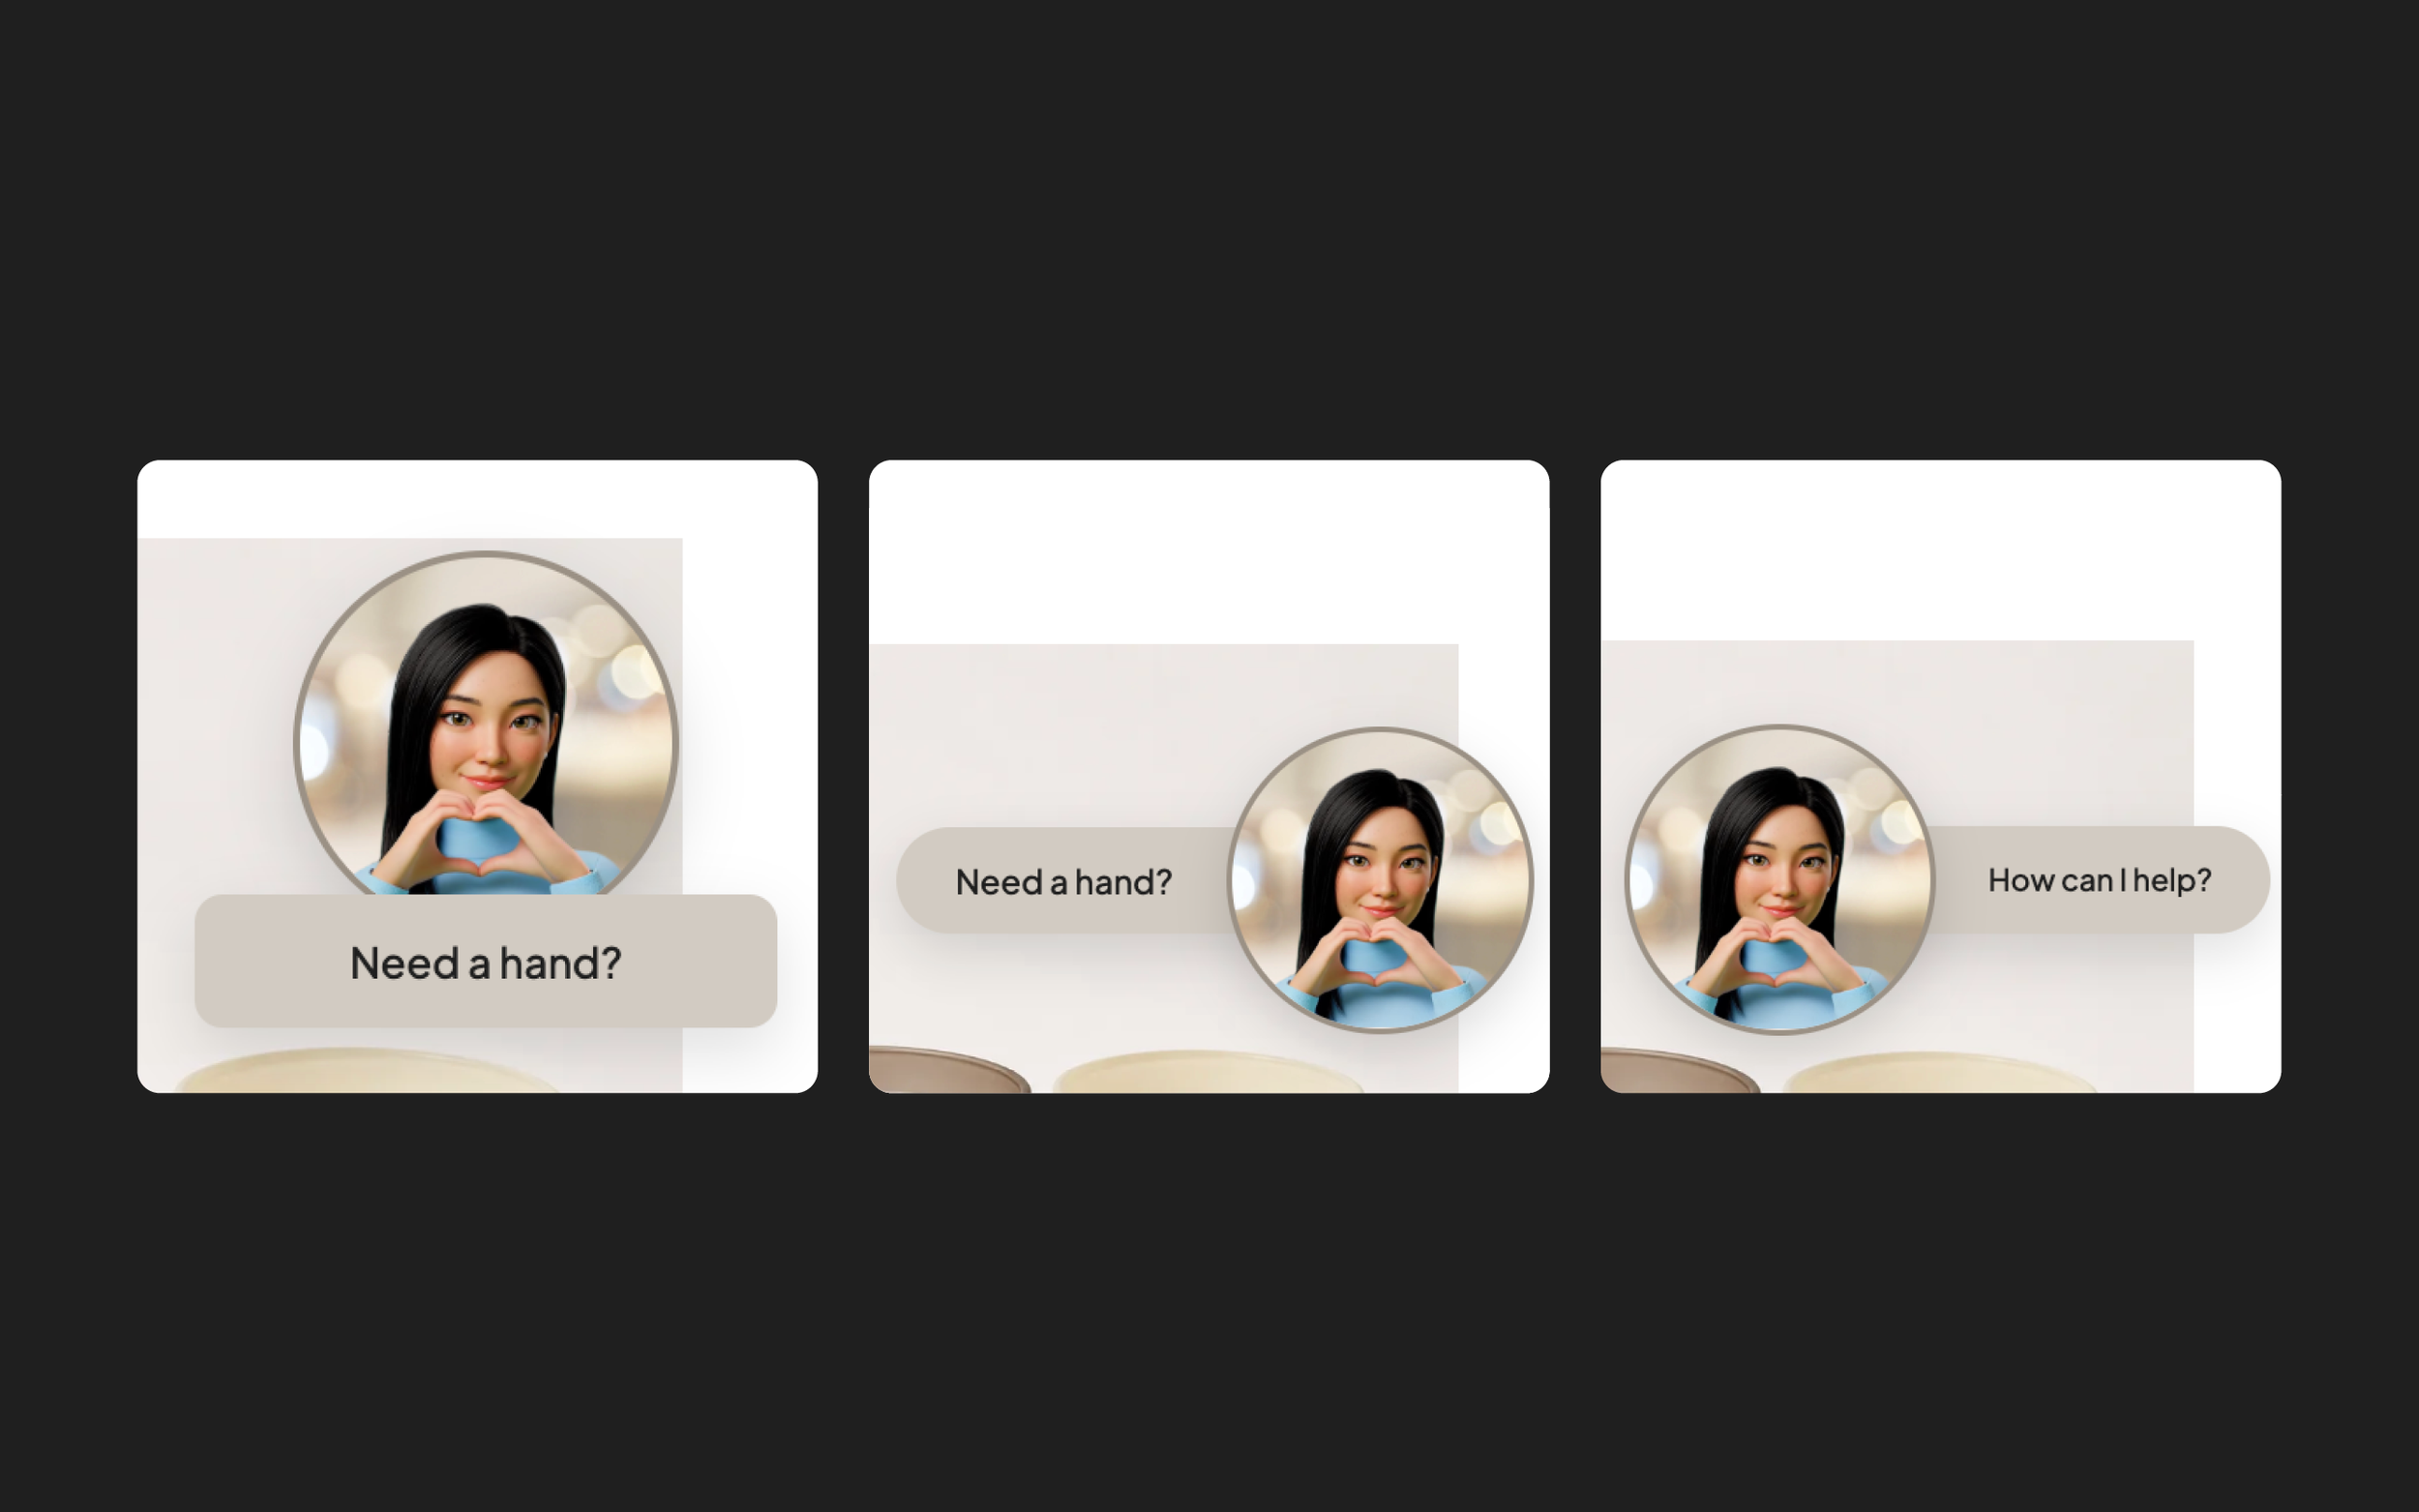
8. Mobile Widget / Launcher
Your mobile Widget / Launcher can either match your desktop styling or use its own custom appearance.
matchDesktop: true
matchDesktop: false
true = use the same Widget / Launcher styling as desktop
false = use separate styling for mobile
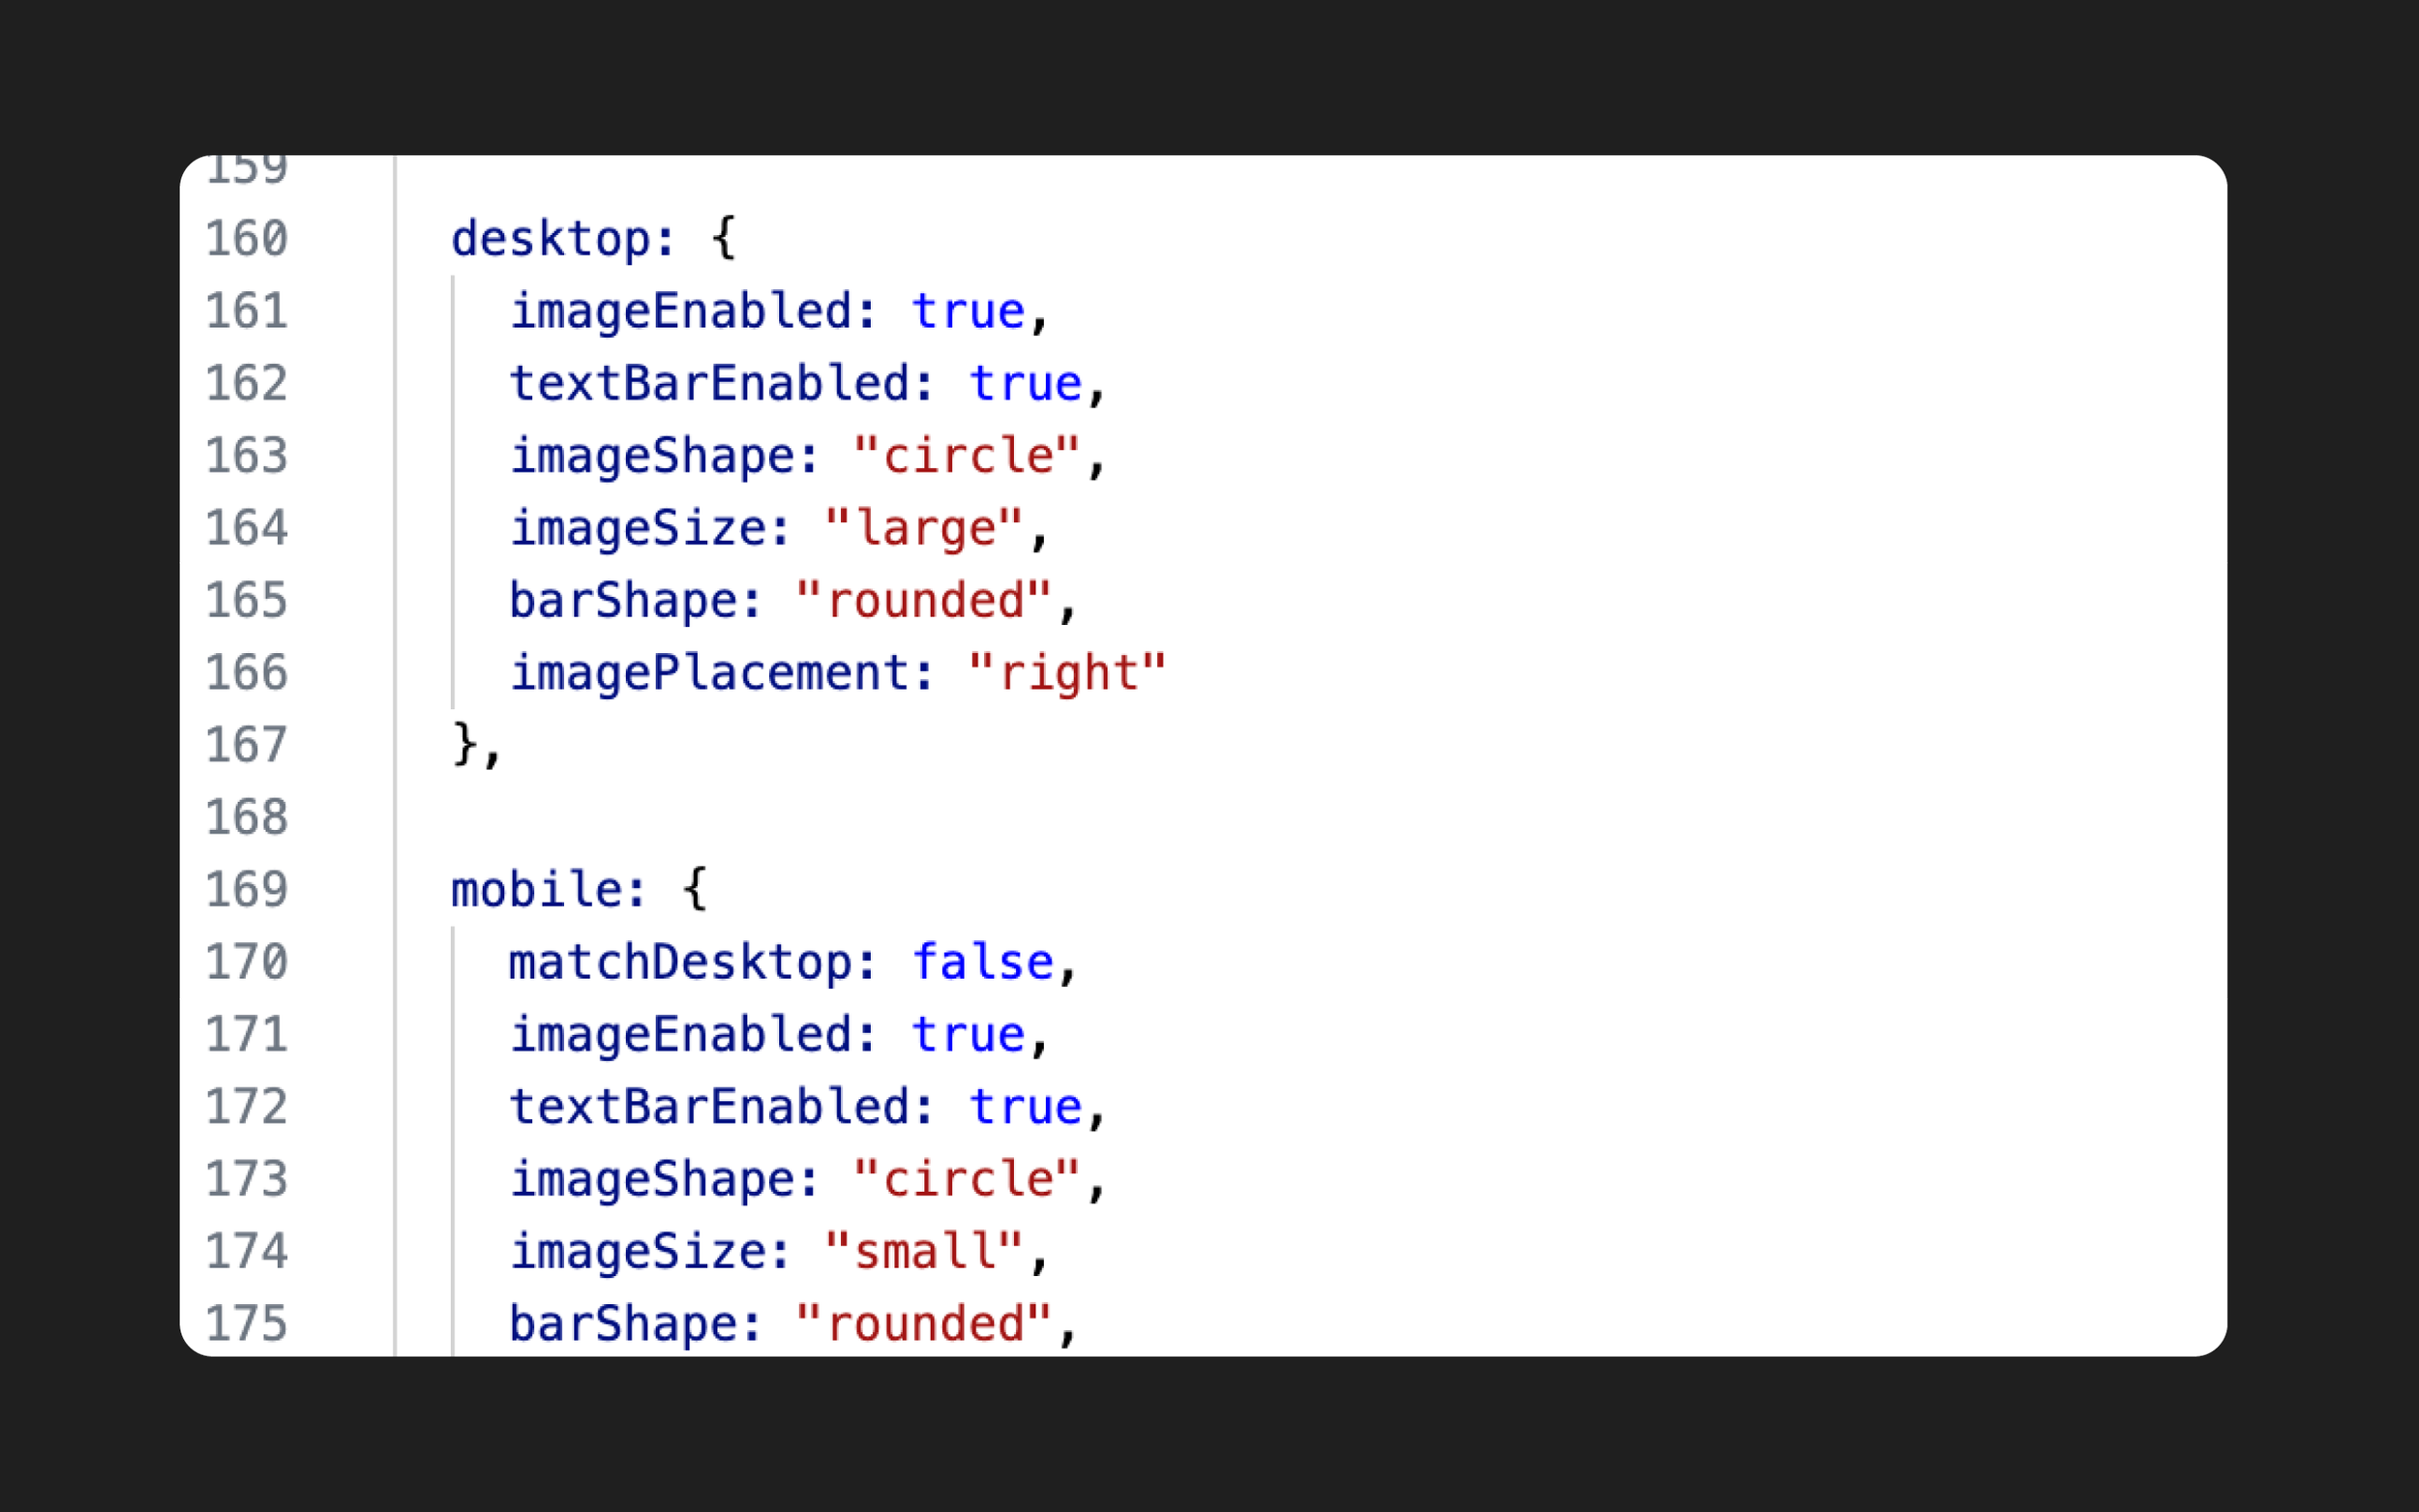
When matchDesktop is set to false, you can customise the mobile Widget / Launcher using the same appearance settings covered in steps 2–7:
imageEnabled
textBarEnabled
imageShape
imageSize
barShape
imagePlacement
Note: Widget position is shared across desktop and mobile, so your bottom-left or bottom-right setting from 1. Widget Position applies to both.
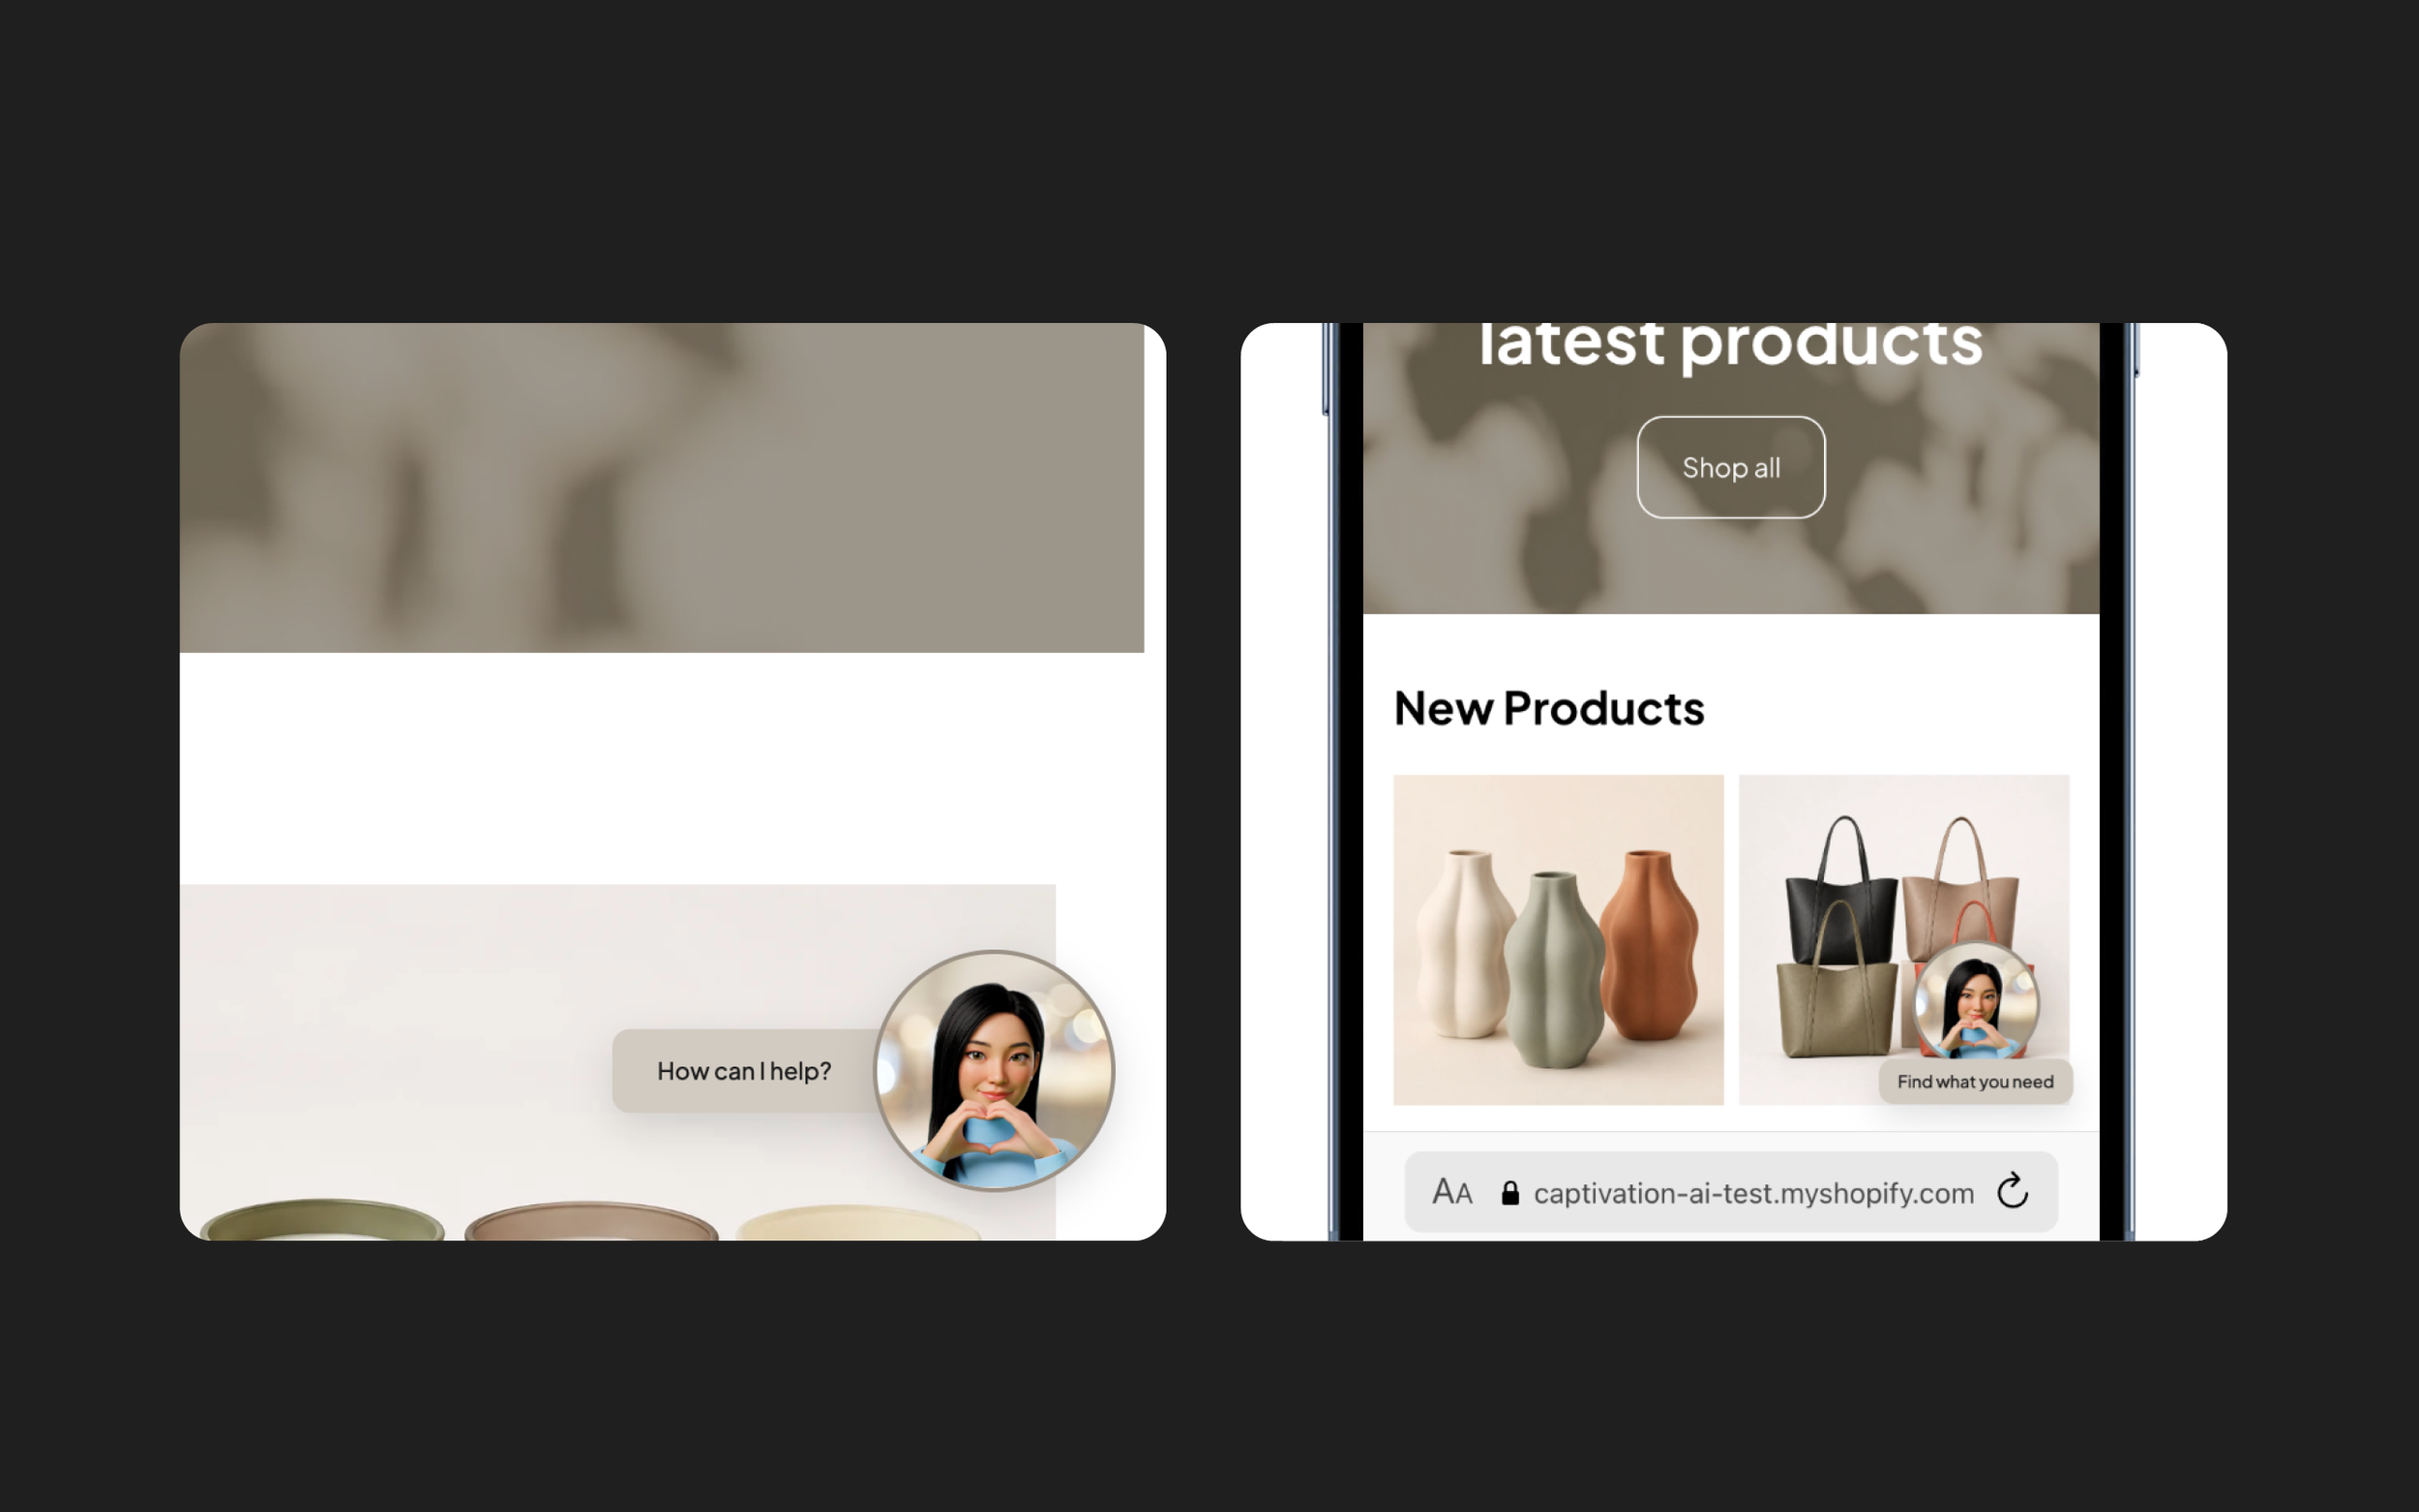
9. Launcher Messages
You can add up to five rotating messages to the Widget / Launcher.
messages: [
"How can I help?",
"Need a hand?",
"Find what you need"
]
Messages rotate automatically within the message bar.
Keep each message short and conversational.
messageInterval: 5
5 = number of seconds between each message
maxMessageCharacters: 26
26 = maximum supported message length
You can set a lower number if you would like consistently shorter messages.
Note: If a message is longer than the selected maximum, Captivation will shorten it automatically, with 3 dots
10. Colours
Customise the Widget / Launcher colours to match your brand and storefront.
barColor: "#1F1F1F"
Controls the message bar background colour.
barTextColor: "#FFFFFF"
Controls the message text colour.
imageBorderColor: "#8A8A8A"
Controls the border around your SuperAgent image.
imageBackgroundColor: "#EBEBEB"
Controls the solid background colour behind your SuperAgent.
Use standard HEX colour values for each setting.
For example:
#000000 = black
#FFFFFF = white
#EBEBEB = light grey
Note: imageBackgroundColor is used when a background image is not enabled.
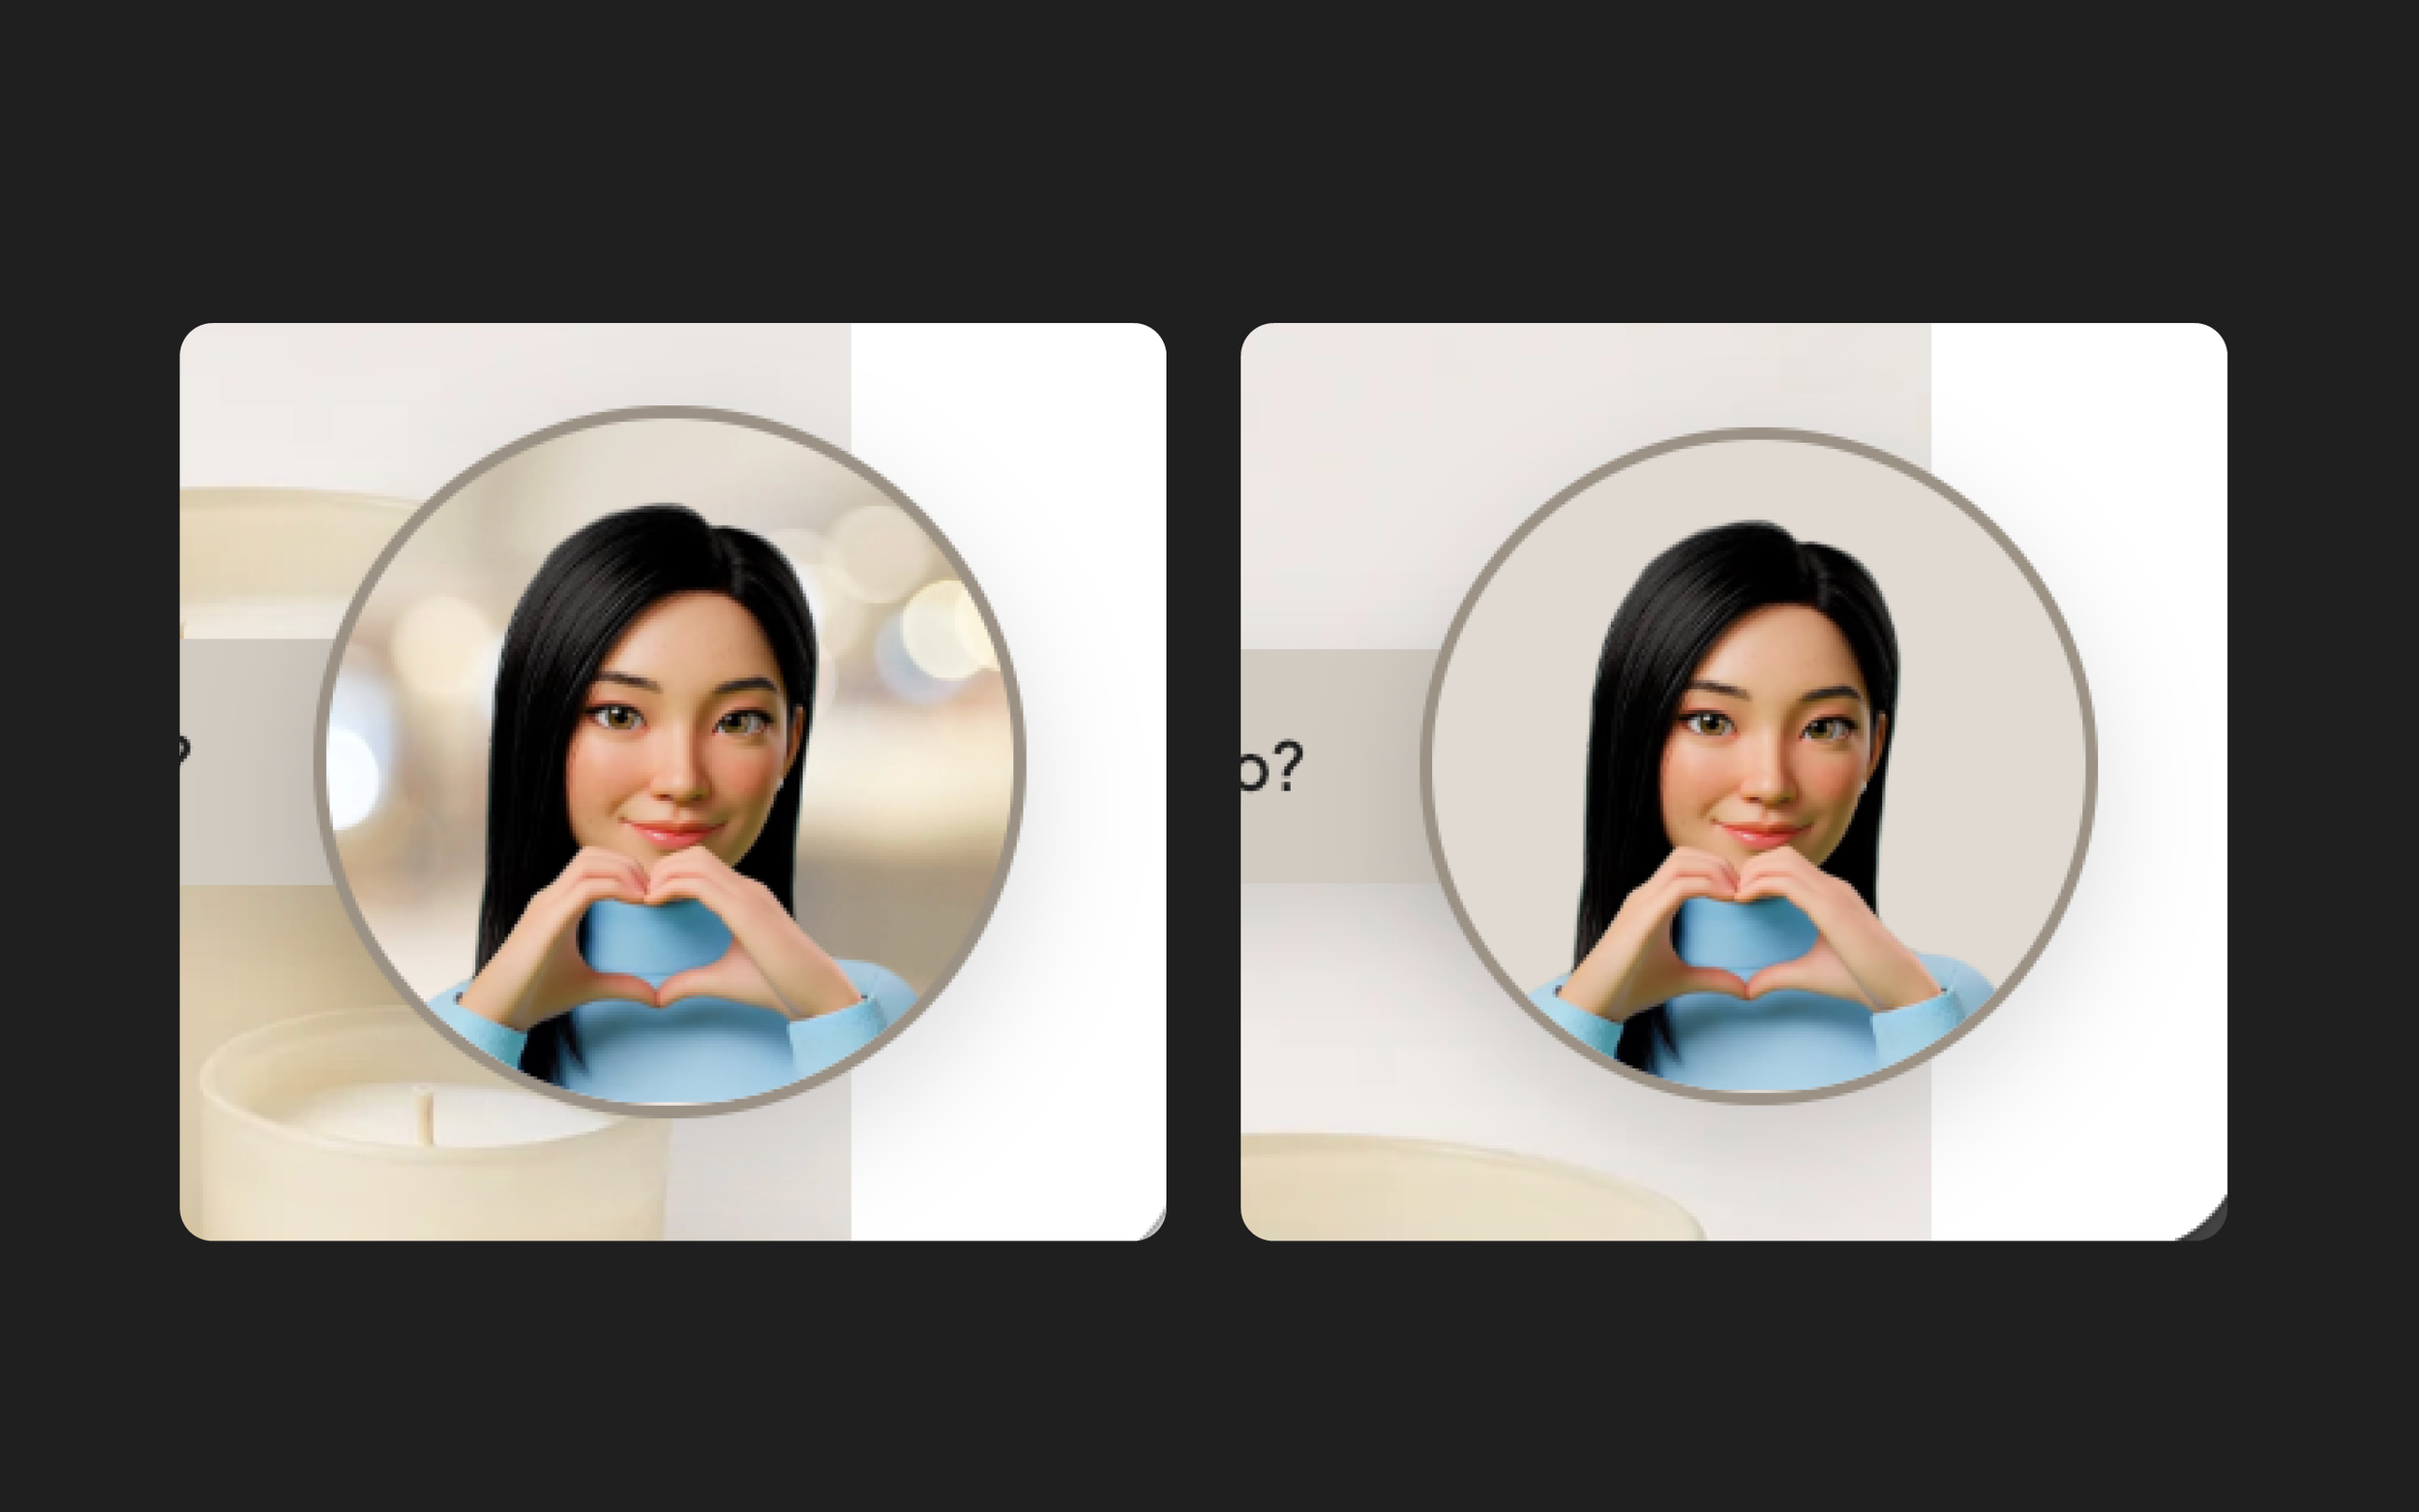
11. Background behind your SuperAgent
You can use either a solid colour or a background image behind your SuperAgent.
To use a background image:
backgroundImageEnabled: true
backgroundImage: "YOUR_IMAGE_URL"
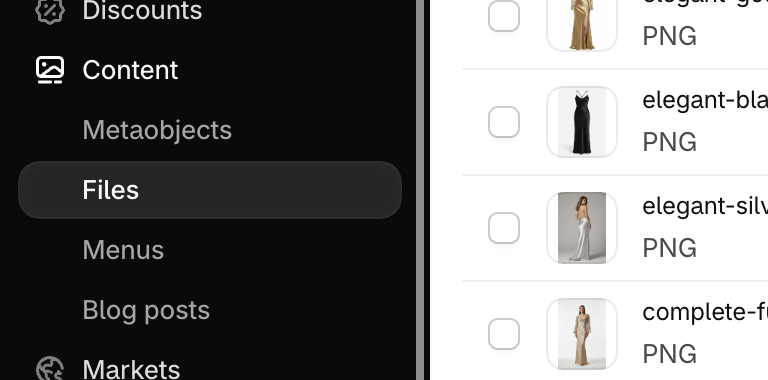
Upload your image in Shopify:
Shopify Admin → Content → Files → UploadThen copy the image URL and paste it between the quotation marks.
To use a solid colour instead:
backgroundImageEnabled: false
When set to false, Captivation will use your:
imageBackgroundColor
setting from 10. Colours.
Tip: Use a simple image with enough contrast so your SuperAgent remains clear and easy to see.
12. Expanded Portrait & Landscape Header
Customise the header that appears when your SuperAgent experience is opened.
headerColor: "#1F1F1F"
Controls the header background colour.
headerTextColor: "#FFFFFF"
Controls the header text and icon colour.
headerText: "Ask our SuperAgent"
Controls the wording displayed in the header.
For example:
headerText: "How can we help?"
The same header styling is used across both the Expanded Portrait and Expanded Landscape views.
On mobile, the SuperAgent opens full screen using the same header settings.
Preview, Test & Publish
Your Captivation code includes default styling, but you can adjust the Widget / Launcher to suit your storefront.
Only change the settings inside the CaptivationSettings section of the code.
1. Save & Preview
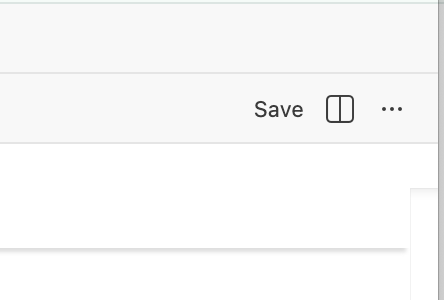
Click Save in the Shopify code editor. In the top right corner
Return to:
Shopify Admin → Online Store → Themes
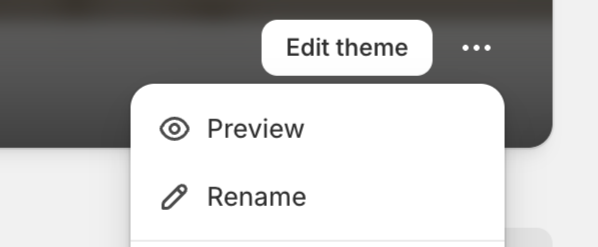
Find your duplicated Captivation Test theme and select:
••• → Preview
Your Widget / Launcher should now appear on the preview storefront.
Check the experience on both desktop and mobile, including your Widget / Launcher styling and the Expanded Portrait and Landscape views.
2. Test your SuperAgent
Open the preview of your Captivation Test theme and test the full experience before publishing.
Check the SuperAgent across both desktop and mobile, including:
Widget / Launcher
Make sure it appears correctly, opens smoothly and matches your chosen styling.
Expanded Portrait & Landscape
Check both views display correctly and the experience resizes as expected.
Voice & microphone
Allow microphone access and test a spoken conversation.
Products & variants
Ask your SuperAgent to find different products and check that product information, options and variants are correct.
Add to cart
Add a few different products and variants to your cart and confirm the correct items and quantities are added.
Product & cart navigation
Check product pages and your Shopify cart open correctly within the storefront.
We recommend testing a few different products and variants before publishing.
3. Publish your Theme
Once you are happy with the preview and testing, return to:
Shopify Admin → Online Store → Themes
Find your Captivation Test theme and select:
••• → Publish
Confirm the change when prompted.
Your Captivation SuperAgent will now be live across your Shopify storefront.
Once published, complete one final check on the live site across both desktop and mobile.
Troubleshooting & Support
If something does not look or behave as expected, work through the checks below before making further changes to your theme.
Widget / Launcher not appearing
Check that:
Your theme changes have been saved
You are previewing the correct Captivation Test theme
widgetEnabled: true
Your captivationId is entered exactly as supplied
The complete Captivation code has been pasted immediately above </body>
There is only one CaptivationSettings block and one widget.js script in the theme
If the Widget / Launcher appears in your preview but not on your live site, check that the updated theme has been published.
Changes are not showing
After updating your settings:
Save → Refresh your theme preview
If the previous styling still appears, try opening the preview in a new browser window or private/incognito window.
Also check that you are editing and previewing the same Shopify theme.
No SuperAgent is appearing?
Your SuperAgent and voice are connected to your Captivation ID and managed by Captivation.
Check that:
captivationId: "YOUR_CAPTIVATION_ID"
contains the correct ID supplied during onboarding.
Do not change the Captivation ID to switch SuperAgents.
Mobile looks different to desktop
Check your mobile setting:
matchDesktop: true
true = match your desktop Widget / Launcher
matchDesktop: false
false = use the custom settings inside the mobile section
Background image is not appearing
Check that:
backgroundImageEnabled: true
and that backgroundImage contains a valid image URL.
For Shopify-hosted images, upload through:
Shopify Admin → Content → Files
Then copy the image URL into your Captivation settings.
To return to a solid background colour:
backgroundImageEnabled: false
Microphone or voice is not working
Make sure microphone access has been allowed for your Shopify storefront in the browser.
If permission was previously denied, open your browser's site permissions, enable microphone access, then refresh the page.
Product or cart behaviour is incorrect
Test the issue with a specific product and check:
Product
Is the correct product being opened or recommended?
Variant
Is the correct size, colour or other option selected?
Cart
Is the correct product, variant and quantity being added?
Some Shopify themes use custom cart drawers or notifications, so their behaviour can vary slightly.
If the item is unavailable or sold out, Shopify may also prevent it from being added to cart.
Widget / Launcher overlaps another site tool
If another chat button, accessibility tool or fixed element occupies the same corner, change:
position: "bottom-right"
to:
position: "bottom-left"
or vice versa.
Still need a hand?
If you are still having trouble, send the Captivation team:
Your Shopify storefront URL
The page where the issue is occurring
Whether it happens on desktop, mobile or both
Your browser and device
A screenshot or short screen recording
For product or cart issues, the product URL and the result you expected
We’ll help you get everything working as it should!